Overview
Are you looking for a simple, affordable, and easy DIY patio project to enhance your outdoor living space? Look no further than creating a patio with concrete pavers. This project is perfect for those who want to upgrade their backyard and outdoor space but don’t want to spend a lot of money or time.
Here is a step-by-step guide on how to create a DIY patio with concrete pavers:
Step 1: Plan Your Patio Design
Identify the area in your backyard where you want to create your patio. Determine the size and shape of your patio. It’s recommended to keep your patio’s design simple to reduce the amount of work you need to do.
Step 2: Prepare the Ground
Clear the area of any grass or debris. Then, use a sod cutter to easily remove the grass and soil from the patio area. Ensure that the area is level and that there is a flat surface for the patio.
Step 3: Create a Base
Prepare the base material by using a layer of sand or leveling sand that is 1-2 inches deep. Level the sand using a garden hose or a rake, making sure it is compacted. Next, place plastic edging to contain the pavers and prevent them from spreading.
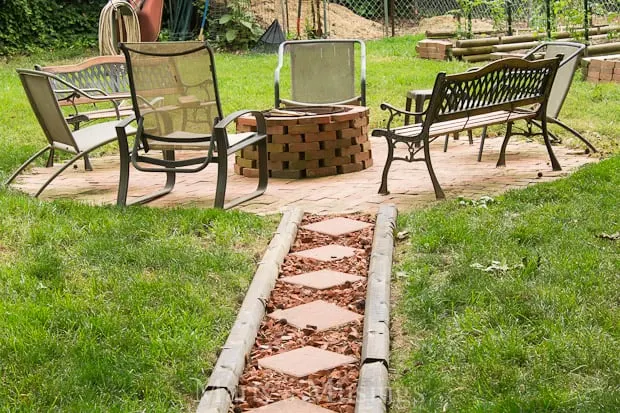
Step 4: Install the Pavers
Lay the concrete pavers out in the desired pattern. Tap the pavers into place with a rubber mallet and level each one as you go. Continue with this until the entire patio has been covered with the pavers.
Step 5: Fill in the Joints
Once the pavers have been installed, fill in the joints with polymeric jointing sand, using a broom to ensure that the sand is evenly distributed. Sweep away any excess sand, taking care not to disturb the joints.
Step 6: Enjoy Your Patio
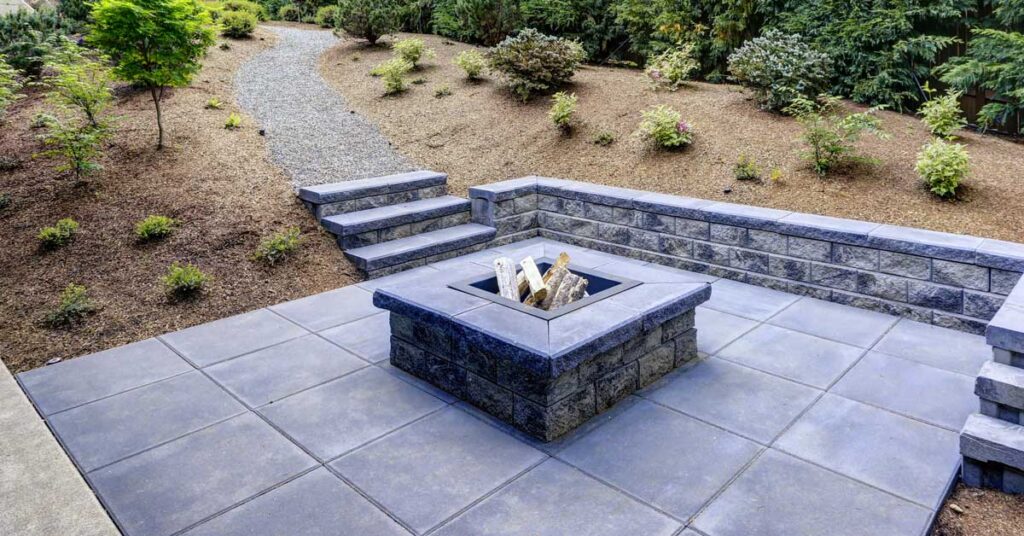
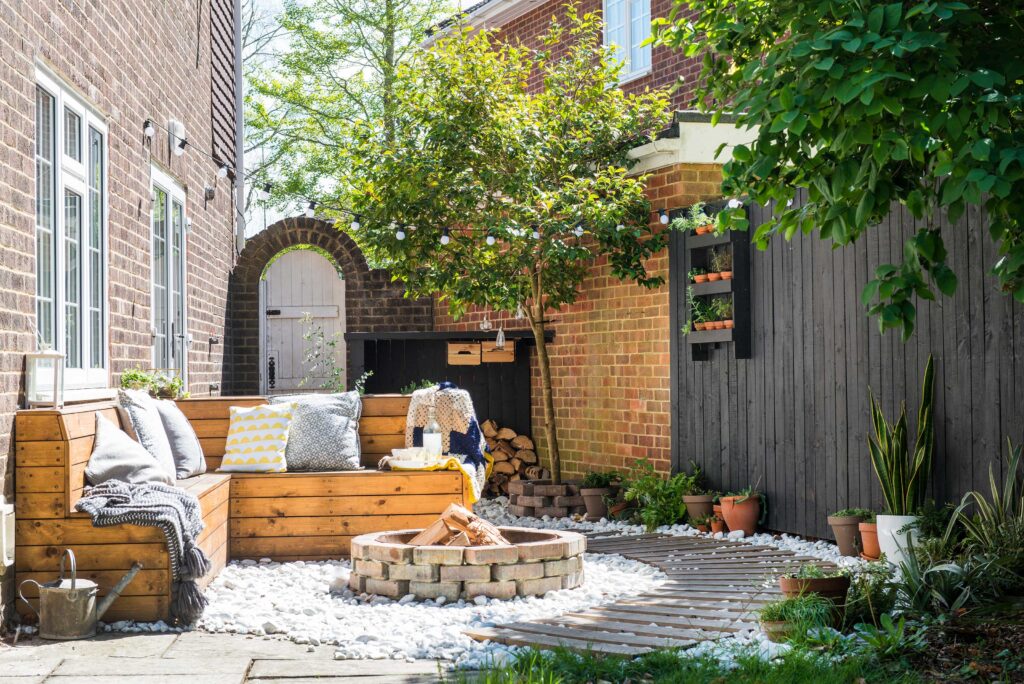
Add finishing touches to your patio, such as furniture, string lights, or a best patio umbrella. Invite friends and family over for an outdoor dining experience or spend time enjoying your new outdoor living space on your own.
This project is budget-friendly, easy to complete, and provides a functional and beautiful outdoor space for you to enjoy any season. With these simple step-by-step instructions, you can create a beautiful, affordable, and easy DIY patio that will enhance your outdoor living space and provide countless memories with family and friends.
Benefits of DIY Patio Projects

There’s no need to spend a lot of money to enjoy a beautiful outdoor living space. With a DIY patio project, you can create a personalized and affordable space for you and your family to enjoy year-round. Here are some of the top benefits of taking on a DIY patio project:
1. Cost-Effective
One of the biggest benefits of DIY patio projects is the cost savings. Creating your own outdoor living space allows you to avoid expensive labor costs and markups associated with pre-built patios. You can source materials on your own and take on the project at your own pace, making it a more budget-friendly option.
2. Creative Freedom
When you create your own patio, you have complete creative control over the design and materials used. You can choose from a wide range of pavers, bricks, stones, and other materials, allowing you to create a unique and personalized space that reflects your style preferences.
3. Increases Home Value
A well-designed and functional patio can increase the value of your home, making it a smart investment for those looking to sell their property in the future. Plus, a DIY patio project shows that you put in the extra effort to enhance your home’s outdoor living space, which can be a major selling point.
4. Promotes Outdoor Living
A DIY patio project can encourage you and your family to spend more time outdoors, whether you’re enjoying a meal, hosting a barbecue, or simply relaxing in the fresh air. Studies have even shown that spending time outdoors can offer numerous health benefits, such as improved mood and reduced stress levels.
5. Sense of Accomplishment
Finally, completing a DIY patio project is a fulfilling experience that can give you a sense of pride and accomplishment. Seeing your hard work pay off in the form of a beautiful new patio space is a rewarding feeling that can boost your confidence and inspire future DIY projects.
In conclusion, a DIY patio project is an excellent way to enhance your outdoor living space while enjoying the numerous benefits that come with it. From cost savings to creative freedom to increased home value, building your own patio is a smart investment that can offer years of enjoyment and satisfaction.
What Materials Do You Need for a DIY Patio?

Are you ready to tackle a DIY patio project but not sure where to start? One of the first steps is to determine what materials you’ll need to bring your vision to life. Here are some of the essential items to consider adding to your shopping list:
1. Pavers, Bricks, or Stones
The foundational material for your patio will be the pavers, bricks, or stones that you choose to use. These come in a variety of materials, textures, and colors, so take the time to browse different options until you find the perfect fit for your space.
2. Base Material
To create a level surface for your patio, you’ll need a base layer of material such as gravel or sand. This will provide stability and prevent shifting or shifting of the pavers over time.
3. Leveling Sand
After you have your base material down, you’ll need to add a layer of leveling sand to create a flat surface for your pavers. This is an important step to ensure stability and longevity of your patio.
4. Paver Edging
Edging is an essential component of any patio, as it helps keep the pavers in place and prevents them from shifting over time. This can be made from plastic or metal, and should be installed around the perimeter of your patio.
5. Jointing Sand
Once your pavers are in place, you’ll need to fill the gaps between them with jointing sand. This helps to prevent weeds from growing up through your patio, and gives it a finished, polished look.
6. Tools
Lastly, you’ll need a few key tools to help you complete your DIY patio project. This could include a sod cutter, a wheelbarrow, a rake, and a pressure washer, among others. Take inventory of what you have and what you need before you get started.
A DIY patio project can be an exciting and rewarding endeavor, and with the right materials and tools, you’ll be well on your way to creating a stunning outdoor living space that you can enjoy for years to come.
Concrete Pavers
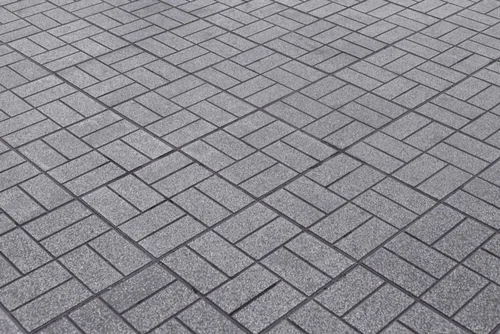
Concrete pavers are a fantastic option for those looking to create a durable and stylish patio. These pavers offer a range of benefits that make them a popular choice among DIYers and homeowners. Let’s take a closer look at some of the advantages of using concrete pavers for your patio project.
First and foremost, concrete pavers are incredibly versatile. They come in a variety of shapes, sizes, textures, and colors, making it easy to customize the look of your patio. Whether you’re looking for a sleek and modern design or something more rustic and natural, there’s a concrete paver that will fit the bill.
Another big advantage of concrete pavers is their durability. These pavers are designed to withstand heavy foot traffic and the elements, so you can expect them to last for years to come. Plus, if any individual pavers do become damaged, it’s easy to simply replace them without having to redo the entire patio.
Beyond their longevity and versatility, concrete pavers are also relatively easy to install. While a DIY project will require some effort and time investment, it’s a great option for those looking to save money on installation costs. With the right tools and step-by-step instructions, even those with little DIY experience can successfully install their own concrete paver patio.
Of course, like any patio material, concrete pavers do have some drawbacks to consider. For example, they tend to be more expensive than other options like gravel or pea gravel. Additionally, installing concrete pavers can require more preparation and leveling work than some alternative materials.
Overall, though, concrete pavers are an excellent choice for those looking for a durable, stylish, and long-lasting patio option. Whether you’re a seasoned DIYer or a first-time patio builder, these versatile pavers are sure to provide a beautiful and functional outdoor living space for years to come.
Layer of Sand or Gravel
When it comes to creating a solid base for your DIY patio project, one material you may consider is a layer of sand or gravel. This base layer is essential for providing a stable and level surface, ensuring your patio remains even and smooth over time.
A layer of sand or gravel offers several benefits for your patio project. For starters, it helps to promote proper drainage. By allowing water to flow through the base layer, you can prevent water from pooling on the surface of your patio, which can cause damage and erosion over time. This is especially important if you live in an area that receives a lot of rain or other types of precipitation.
In addition to drainage benefits, a layer of sand or gravel also helps to prevent soil erosion. This is particularly important if you plan to install your patio on sloped terrain, where water runoff can easily cause the soil to erode and shift over time. By providing a stable and level base layer, you can help prevent this type of damage and keep your patio looking great for years to come.
When it comes to installing a layer of sand or gravel for your patio project, the process is fairly straightforward. First, you’ll need to dig out the area where you plan to install your patio, removing any grass, plants, or other debris. Then, you’ll need to level the surface of the area with a garden hoe or other leveling tool. Once the surface is level, you can add your layer of sand or gravel, spreading it evenly across the area with a rake or shovel.
Depending on the size of your patio and the type of material you choose, you may need to add several inches of sand or gravel to achieve the desired level of stability and drainage. Once the base layer is in place, you can then begin adding your patio pavers or other materials, following the manufacturer’s instructions for installation.
Overall, adding a layer of sand or gravel to your patio project can help provide a stable and level surface while promoting proper drainage and preventing soil erosion. Whether you’re installing a DIY patio for the first time or looking to update an existing outdoor space, incorporating this important base layer can help ensure your patio remains beautiful and functional for years to come.