Purpose of the Article
In this article, we will discuss the importance of a proper base for patio stones. We will explore the different materials that can be used as a base and how to choose the most suitable one for your project. The proper installation of patio stones depends largely on the quality and stability of the base, so understanding what to put under your patio stones is essential for a durable and long-lasting patio. We will also provide tips on how to prepare the ground, level the stones, and prevent weed growth and shifting during heavy rains and other weather conditions.
Overview of the Topic
Patio stones are a popular choice for creating a stable and attractive surface for outdoor patio furniture. However, the stability of the surface depends heavily on the materials used underneath the patio stones. The right materials not only provide the necessary support but also ensure proper drainage and prevent weed growth. In this article, we will provide an overview of the different materials that can be used for patio stone installation and the key steps to take for a stable and long-lasting surface.
To begin with, the installation of patio stones requires a suitable base material that can withstand the weight of the stones and prevent any ground tension. The base layer plays a crucial role in providing a flat surface for the stones while also ensuring that the area is free of any dips or uneven spots. Some commonly used base materials include sand layer, stone dust, layer of gravel, or a paver base material.
Once the base material is installed, it is essential to ensure proper drainage by creating a slight slope so that water can safely run off rather than pooling under the stones. This is important as heavy rains or other weather conditions can damage the surface over time if proper drainage is not ensured.
After the slope is created, a layer of sand is spread over the base material to provide additional support and for leveling the stones. Polymeric sand is a highly recommended material that provides an excellent bond between patio stones, prevents weed growth and erosion.
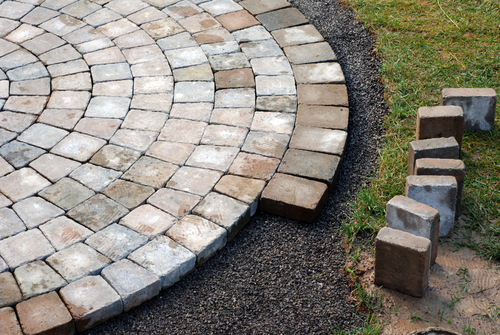
In addition to the materials used, it is also essential to take several key steps for proper installation. First, calculate the square footage of the area to determine how much material is required. Secondly, pack down the base material to ensure stability and eliminate any air pockets under the surface. Thirdly, use a straight edge or outer edge to create an even layout for the stones, and install edge restraints along the outer perimeter to keep them in place.
In conclusion, the installation of patio stones requires a proper understanding of the materials to use and the key steps to take for a stable and long-lasting surface. Using a suitable base material, ensuring proper drainage, and taking the right installation steps, such as using edge restraints, will help create a beautiful and functional outdoor living area.
What Materials to Use for Underneath Patio Stones?
When it comes to building your patio, the base on which it rests is key to ensuring that your patio stones are stable and long-lasting. In this article, we’ll be discussing the various materials that are commonly used to form the base layer for patio stones and what factors to consider when choosing the right material. By the end of this article, you’ll have a good understanding of the options available and be able to choose the best material for the base of your patio stones.
Layer of Sand
One of the key components in creating a durable and long-lasting patio surface is the layer of sand placed underneath the patio stones. This layer of sand provides a solid foundation for the stones and plays a crucial role in ensuring that the stones remain stable and level over time.
When planning a patio project, it is important to determine the appropriate depth for the layer of sand that will be used. Typically, a layer of sand between one and two inches in depth is sufficient for most patio projects, but the exact depth may vary depending on factors such as the type of paver or stone being used, the climate, and the intended use of the patio.
Once the depth has been determined, the next step is to properly prepare the area for the sand layer. This involves removing any existing vegetation or debris from the area, as well as ensuring that the soil is level and compacted.
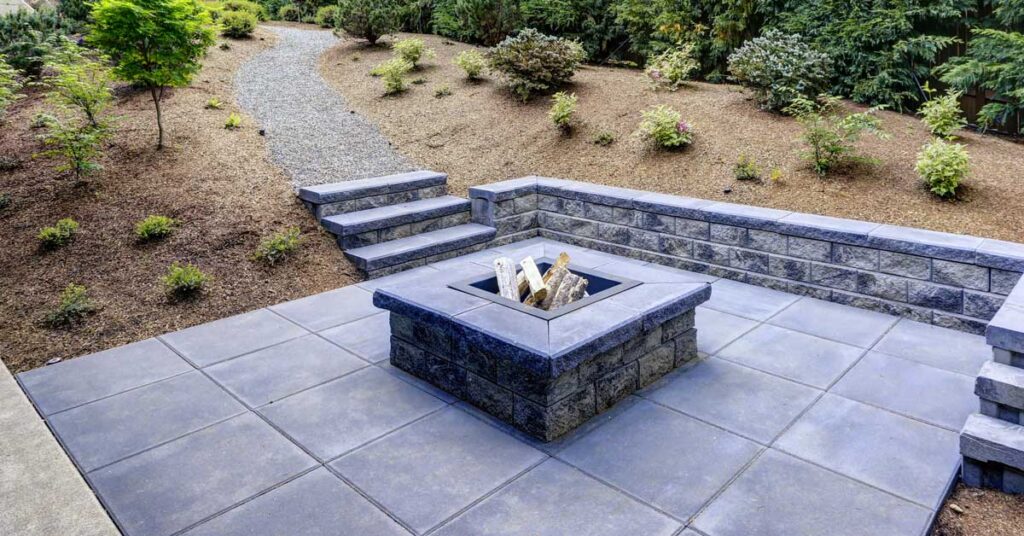
After the area has been prepared, the sand can be added in a uniform layer over the entire patio surface. It is important to use a high-quality sand that is free of stones or other debris that could cause unevenness or instability in the patio surface. While working with patio surface, you can also install a fire pit in it
Once the sand has been added, it is important to level it carefully using a straight edge or other leveling tool. This will help to create a flat and even surface that will provide a stable base for the patio stones.
Overall, the layer of sand placed underneath patio stones plays a critical role in ensuring that the patio surface remains stable, level, and durable over time. By carefully selecting and preparing the sand layer, and taking care during the installation process, homeowners can create a beautiful and functional patio surface that will provide years of enjoyment.
Polymeric Sand
Polymeric sand is an ideal material for filling the joints between patio stones and pavers. Unlike traditional jointing materials like regular sand or stone dust, polymeric sand is a high-tech mixture of fine sand and synthetic polymers that form a flexible, yet durable bond. It has several benefits over other jointing materials, making it a popular choice for homeowners and contractors alike.
One of the key advantages of polymeric sand is its ability to resist water and extreme weather conditions. Regular sand or stone dust can easily wash out or erode over time due to heavy rains or prolonged exposure to sunlight. Polymeric sand, on the other hand, is specifically designed to withstand these weather conditions, making it a reliable option for long-term use.
Moreover, polymeric sand comes in various colors to match a wide range of patio stone or paver designs. This means you can choose a color that complements your outdoor space and gives it a seamless look. A variety of colors also allows you to create contrasting borders or patterns for a more unique and aesthetically pleasing design.
Polymeric sand also prevents weeds from growing between your patio stones or pavers. The synthetic polymers in the mixture inhibit weed growth, reducing the need for constant maintenance and weed removal. This results in a clean and polished look for your patio or walkway.
The application process of polymeric sand is relatively easy and straightforward. Once the patio stones have been laid and the joints have been cleared of any debris, the polymeric sand is poured onto the surface. After that, a gentle mist of water is sprayed to activate the bonding agent in the mixture. Once the mixture has hardened, you can brush or blow off any excess sand.
Overall, polymeric sand is a durable, practical, and visually appealing option for filling the joints between patio stones or pavers. It provides a stable base, reduces weed growth, and improves the overall aesthetic of your outdoor space. With a variety of colors and a long lifespan, polymeric sand is an excellent investment for any patio or walkway project.
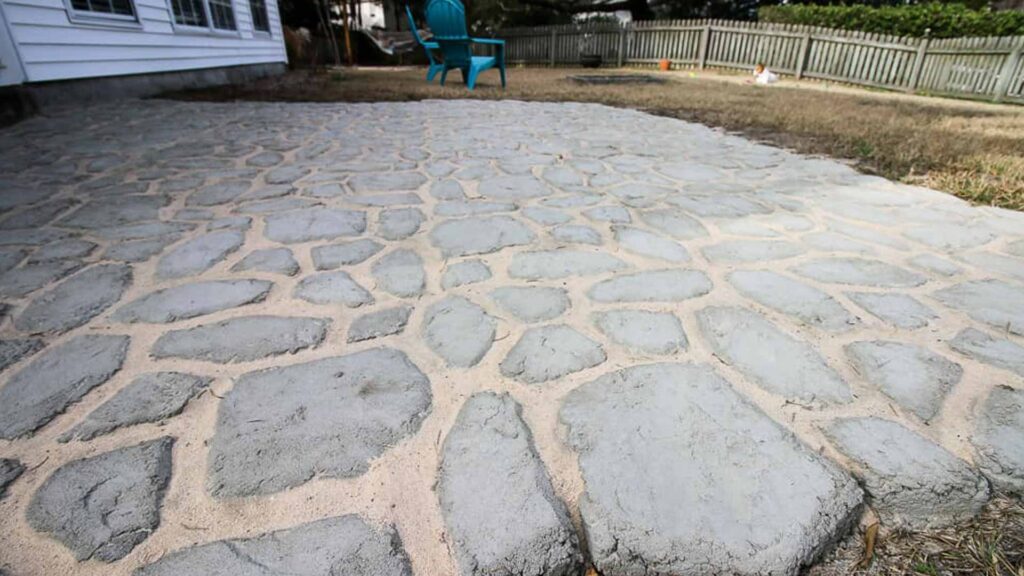
Concrete Pavers
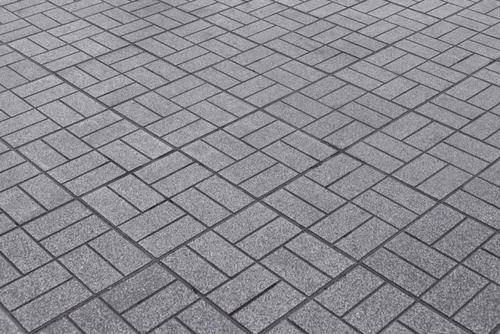
Concrete pavers are a popular choice for outdoor flooring due to their durability, versatility, and affordability. They are available in a wide variety of sizes, shapes, and colors, making them suitable for a range of design styles and applications.
One of the key advantages of concrete pavers is their durability. They are able to withstand heavy foot traffic, harsh weather conditions, and even vehicular traffic when installed properly. This makes them an excellent choice for driveways, walkways, patios, and other outdoor spaces that require a strong and sturdy surface.
Another advantage of concrete pavers is their versatility. They can be arranged in different patterns and designs, allowing for endless creative possibilities. They can even mimic the appearance of more expensive natural stone pavers, making them a budget-friendly alternative without compromising on aesthetics.
Installing concrete pavers is a relatively easy and straightforward process. The first step is to prepare the surface by ensuring it is level and has proper drainage. A base material such as stone dust is often used to provide a stable foundation. Then, the pavers can be laid down in the desired pattern, with a layer of sand or polymeric sand spread over the surface to fill the joints and provide additional stability.
One of the benefits of using sand or polymeric sand as a filler is that it allows for proper drainage and reduces the risk of water damage and ground tension. Additionally, it prevents weed growth between the pavers, reducing the need for constant maintenance and weed removal.
Overall, concrete pavers are an excellent choice for outdoor flooring due to their durability, versatility, and affordability. With proper installation and maintenance, they can provide a long-lasting and aesthetically pleasing surface for your outdoor space.
Base Materials
When it comes to installing patio pavers, choosing the right base materials is crucial for ensuring a long-lasting and sturdy surface. The base materials serve as the foundation of the patio and provide support for the pavers.
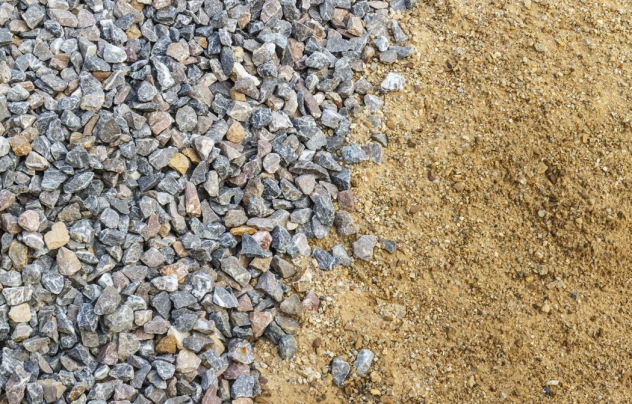
There are various types of base materials that can be used, depending on the specific needs of the project. One common option is a layer of sand, which can provide stability and allow for proper drainage. A layer of gravel can also be used, which is especially helpful for areas with heavy rainfall or poor soil conditions.
Stone dust is another popular choice for a base material. It is a finely crushed stone that can help create a stable base for the pavers and prevent them from shifting or settling over time. Additionally, stone dust provides better water drainage and helps control weed growth.
When choosing a base material, it’s important to consider the proper depth and thickness. Typically, a 1-inch thick layer of base material is sufficient for most patio paver installations. However, for areas with heavy foot traffic or vehicular traffic, a thicker layer of base material may be required to provide additional support.
Along with the choice of base material, it’s crucial to ensure that the surface is level. A slight slope can be beneficial for proper drainage, but the pavers themselves should be level to prevent tripping hazards and instability.
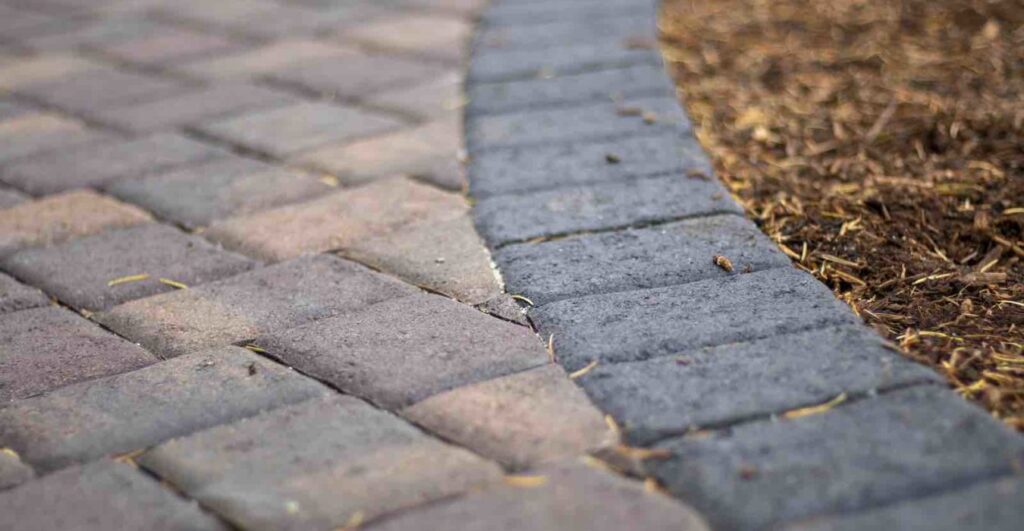
Other important factors to consider when installing base materials include the use of edge restraints or paver edging to keep the pavers in place, as well as a weed barrier to prevent weeds from growing up through the surface. A straight edge can also be used to ensure straight lines and precise cuts.
Ultimately, the choice of base material depends on the specific needs and environmental factors of the paver project. Whether it’s sand, gravel, or stone dust, selecting the right base materials is essential for a successful and long-lasting patio installation.
Stone Dust
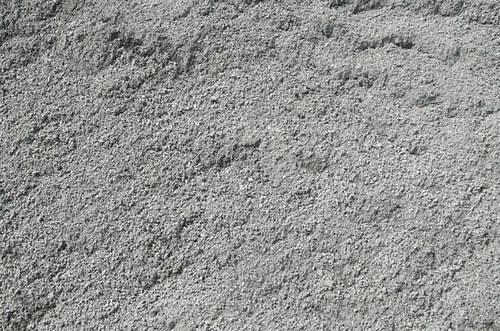
Stone dust is a popular choice for filling in the gaps between patio stones or as a base material for paver installations. It is a finely crushed stone that is often used as a substitute for sand. One of the main benefits of stone dust is that it can help create a stable base for the pavers and prevent them from shifting or settling over time.
In addition to providing better stability, stone dust also has excellent water drainage properties. This is important to prevent water from pooling on the surface, which can damage the pavers and compromise the structural integrity of the patio or walkway. By allowing water to drain freely, stone dust helps to prevent the formation of puddles or standing water, which can also attract insects and other unwanted pests.
Another advantage of stone dust is that it can help control weed growth. By providing a dense layer of material between the pavers, stone dust can help prevent weeds from growing up through the surface. This can save homeowners time and money on maintenance and upkeep, as they won’t have to constantly pull weeds or treat the surface with harsh chemicals.
When using stone dust as a base material, it’s important to ensure that it is evenly distributed and compacted. This will help to create a level surface that is suitable for the installation of pavers or patio stones. Additionally, it’s important to choose the right type of stone dust for the specific project – for example, some projects may require a finer grade of stone dust, while others may require a coarser material.
Overall, stone dust is an excellent choice for those looking to create a stable and durable surface for their patio or walkway. With its superior drainage properties, weed-controlling capabilities, and ease of installation, it’s no wonder that stone dust is such a popular option for landscaping and home improvement projects.
Calculating Square Footage Needed for Underneath Patio Stones
Before starting a patio paver project, it’s important to calculate the square footage needed for the base material. This will help ensure that you have enough material to properly support the patio stones and create a flat, level surface. Follow these steps to calculate the necessary square footage for your project.
First, measure the area where you’ll be installing the patio stones. This can be done by using a measuring tape or by using the length and width of the area and multiplying them together. Remember to take into account any curves or angles in the space, as this will affect the amount of material needed.
Next, determine the appropriate depth for the base material. This will depend on the type of project and the specific recommendations of the manufacturer of the patio stones. However, a common rule of thumb is to have a base layer that is at least 4-6 inches deep.
Once you have the square footage and desired depth, you can calculate the volume of the base material needed by multiplying the square footage by the depth in inches and then dividing by 12 to get the amount in cubic feet. For example, if you have a patio area that is 100 square feet and you want a base layer that is 6 inches deep, you would multiply 100 by 6, which equals 600. Then, dividing by 12, you would need 50 cubic feet of base material.
Common materials used for patio paver base include stone dust, sand, and gravel. Take into account the specific type of material you’ll be using and its density when calculating the amount needed.
Remember to account for a slight slope in the base material, which will help with proper drainage. Additionally, you may want to add a layer of weed barrier fabric on top of the base material to prevent weed growth.
Calculating the necessary square footage and volume of base material for a patio paver project may seem daunting, but taking the time to do so will ensure that you have enough material for a stable, long-lasting installation.
Measuring Square Footage Needed

When it comes to creating a patio or outdoor space, one of the most important aspects is measuring the square footage needed. Accurately measuring the space will ensure that you have enough materials to complete the project, while also helping to keep costs down. Here are some tips and tricks for measuring square footage needed for your patio project.
First, it’s important to determine the purpose of your patio. Will it be used for dining and entertaining, or for a more relaxed seating area? This information will help you determine the size and shape of the patio.
Next, measure the length and width of the area you want to cover. Be sure to measure the farthest points, as this will give you the most accurate measurement. If you have curves or angles in your space, break it down into smaller shapes to make measuring easier. For example, if you have a curved edge, measure straight lines between the curves to make it more manageable.
Once you have the basic measurements, use a calculator to multiply the length and width together to get the total square footage. For example, if your patio is 10 feet by 20 feet, the total square footage would be 200 square feet. Don’t forget to add extra square footage for any additional spaces, such as a walkway or seating area.
It’s important to note that the square footage needed can vary depending on the type of materials you select. Some materials, like large pavers, may have wider gaps between each piece, while others such as smaller tiles will require closer spacing. Make sure to research the material you plan to use to make sure you have an accurate measurement.
Measuring square footage needed for your patio project is a crucial step to ensuring a successful build. By taking accurate measurements and accounting for any unique features in your outdoor space, you’ll be able to choose the right materials and complete the project with confidence.
Dealing with Excess Sand or Gravel
After you’ve determined the size and shape of your patio, it’s time to start thinking about what goes underneath. Proper base materials are important for the longevity of your patio, and excess sand or gravel can cause problems down the line.
One of the most common mistakes people make when installing a patio is using too much sand. While a layer of sand is necessary to create a flat surface, using too much can cause issues with drainage and stability. If you notice excess sand after laying your patio stones, use a leaf blower to remove any loose sand from the surface. Be careful not to blow away too much sand and create a dip in your patio.
Gravel can also cause issues if too much is used. Excess gravel can create an uneven surface and lead to stability issues. If you notice excess gravel after laying your patio stones, use a straight edge or level to remove any excess and create a level surface. It’s important to make sure your patio stones are level to prevent tripping hazards and ensure proper drainage.
Proper drainage is crucial for the longevity of your patio. A layer of gravel can help with drainage and prevent soil erosion. If you’re installing a larger patio or live in an area with heavy rains, consider adding a layer of gravel to your base. This will help prevent water from pooling on your patio and causing damage.
Lastly, don’t forget to add edge restraints to your patio. Edge restraints, such as plastic or metal edging, help keep your patio stones in place and prevent weed growth. They also give your patio a finished look. Use a diamond blade to cut the edge restraints to size and secure them to the outer edge of your patio.
In the end, proper base materials and installation are key to a long-lasting and stable patio. Be mindful of excess sand or gravel and take the time to ensure proper drainage and edge restraints. With the right support functions, your patio project will be a success.
Preparing the Ground for Laying Patio Stones
If you’re planning on adding a patio to your backyard or outdoor living space, one of the most important steps is preparing the ground for laying patio stones. Proper ground preparation is crucial for the longevity and stability of your patio. Follow these steps to ensure a successful project:
1. Assess the area: Before you start digging or adding any materials, make sure you assess the area where you want to lay your patio. Take accurate measurements of the space and determine whether the ground is flat or sloping.
2. Decide on the type of patio stones and base layer: There are a variety of patio stones available, including natural stone and concrete pavers. Choose the type of stone that best suits your style and budget. For the base layer, you can use a variety of materials, including gravel, sand, and stone dust. Consult with a professional or do research to determine the best base layer for your particular project.
3. Clear the area: Remove any vegetation or obstacles such as rocks or roots from the area where you plan to lay the patio. It’s important to create a level surface by removing any high spots and filling in any low spots.
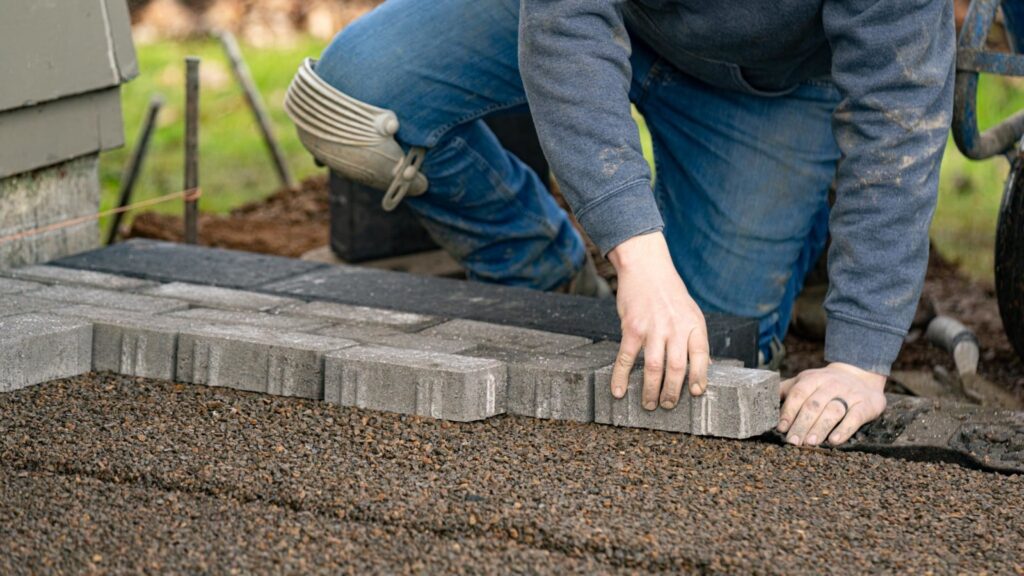
4. Dig a trench: Dig a trench around the perimeter of your patio area. This will serve as the edge restraint for the patio stones. The depth of the trench should be based on the thickness of your patio stones, plus an additional 1-2 inches for the base layer.
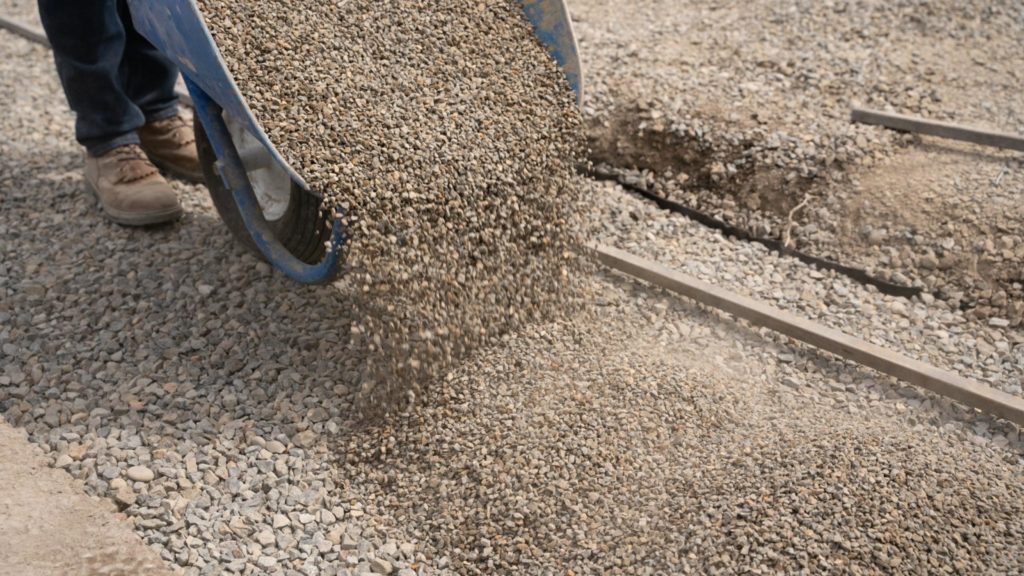
5. Add the base layer: Add your chosen base layer material to the excavated area. Use a rake to level the material and ensure a uniform thickness. It’s important to make sure the base layer is level to prevent tripping hazards and ensure proper drainage.
6. Compact the base layer: Use a plate compactor or hand tamper to compact the base layer material. This will help create a stable foundation for the patio stones. It’s important to compact the base layer at every 1-inch drop in elevation to prevent ground tension and ensure proper drainage.
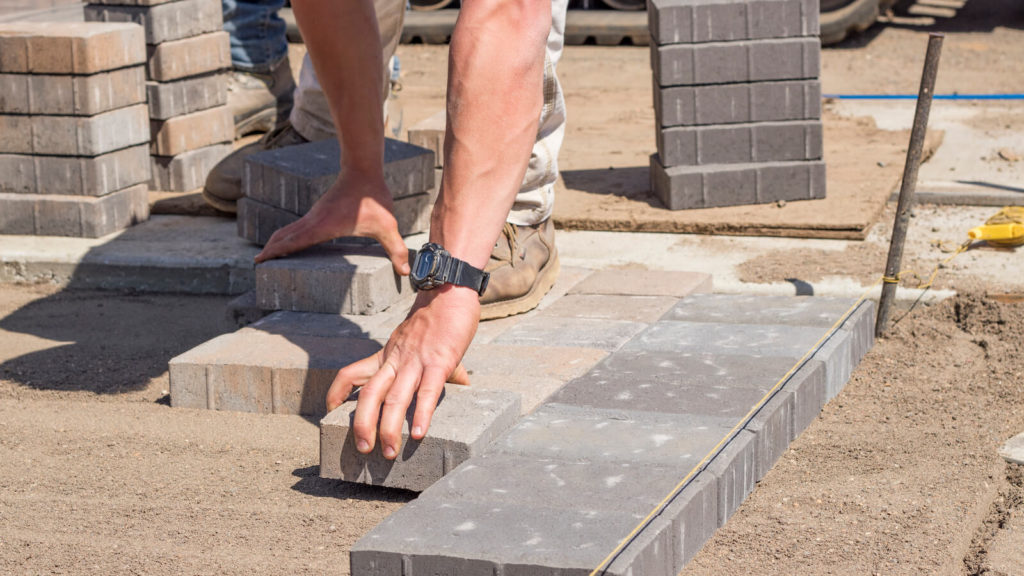
7. Add the patio stones: Once the base layer is compacted, it’s time to lay the patio stones. Start from an outer edge and work your way inward. Use a level to ensure each stone is level before moving on to the next one.
8. Add edge restraints: Once the patio stones are in place, it’s important to add edge restraints to prevent the stones from moving and to prevent weed growth. Use plastic or metal edging and a diamond blade to cut the edging to size. After all is done, you can also give your patio a nice privacy.
Preparing the ground for laying patio stones is an important step in creating a beautiful and stable outdoor living space. Follow these steps and consult with professionals for any questions or advice.
Proper Depth and Flat Surface Preparation
When it comes to laying a patio with stones, the most important step is preparing the ground with the proper depth and creating a flat surface. Skipping this crucial preparation step can result in an uneven, unstable patio that won’t withstand heavy rains or varying weather conditions.
To begin with, it’s essential to decide on the depth of the base layer depending on the type of patio paver you are going to use. Generally, a 1-inch thick layer of sand or gravel is required for patio pavers to be placed on. This base layer provides support for the patio stones and helps prevent them from shifting, cracking or wobbling.
Once you have a good idea of the depth of the base layer, you’ll need to prepare the ground by excavating the area where the patio will be installed. This step involves removing any grass or vegetation in the area and ensuring that the ground is flat. This is necessary because if the ground is not leveled properly, your patio will be uneven, leading to spots where the patio stones are higher or lower than other spots, resulting in trip hazards or an unattractive patio installation.
To ensure you have a flat and level surface, start by using a straight edge, such as a long piece of wood or a level, and place it on top of the ground where you plan to install the patio. Then check for any uneven spots or high and low areas. Use a shovel or rake to level the high areas and fill in the low spots until you have a flat surface. When you have the surface ready, use a hand tamper or plate compactor to compact the base layer of gravel or sand to create a solid and stable foundation for the patio paving stones.
Remember that even slight sloping should be considered, as drainage is essential in keeping the patio stable enough to last. In case of heavy rainfall, having a slight slope will allow water to run off or seep through the gabs in the stone, preventing it from piling up in one spot and damaging your patio.
Overall, proper depth and flat surface preparation are crucial steps in the installation process for a patio with stones. Taking the time to do this correctly will ensure that your patio has a stable foundation, and you can enjoy it for years to come.
Paver Base Material Selection and Installation
When embarking on a paver project, selecting the right base material is crucial to the success of your installation. The base material provides support for your pavers and helps prevent shifting and cracking over time. With a wide variety of materials available in the market, selecting the right one for your project can be overwhelming. Here are some factors to consider when choosing and installing paver base material.
Type of Project
The type of project you are undertaking will determine the type of base material you should use. Larger projects will require a thicker base, while smaller projects may only require a 1-inch thick layer of base material. For example, a driveway will require a much thicker base than a small patio. It’s important to note that the base layer should be at least twice the thickness of the pavers you’re using.
Weather Conditions
Weather conditions in your area can also play a significant role in base material selection. Areas that experience heavy rainfall will require a base material that provides proper drainage. If water is not able to drain out quickly from under your pavers, it can cause soil erosion, leading to a weakened foundation and ultimately causing your pavers to shift and crack.
Type of Pavers
Different pavers have varying thicknesses and weights, and these factors will have a bearing on the type of base material you select. For example, natural stone pavers are generally thicker and heavier, which means they require a stronger base material. Failure to use the right base material may lead to sinking or cracking.
Installation and Preparation
The preparation and installation process is equally crucial in ensuring your paver installation lasts. Begin by excavating the area where the pavers will be installed to ensure that the ground beneath them is level. Once you have a flat surface, lay out the appropriate base material. Whether you use gravel, sand, or both, ensure that it is firm and has been properly compacted. A poorly compacted base may lead to shifting of pavers or even cause structural damage to your project.
Edge Restraints
Edge restraints help keep the pavers in place and prevent them from shifting over time. It is crucial to install edge restraints during your initial installation. These can be made from plastic or metal and should be secured to the ground using appropriate materials.
In summary, selecting the right base material is the first step in ensuring a successful paver installation. The factors to consider when selecting a base material include the type of project you’re undertaking, weather conditions in your area, the type of pavers you’re using, installation and preparation, and edge restraints. By considering these factors, you can ensure that your paver installation will be durable and structurally sound for many years to come.
Understanding Ground Tension Before Paver Installation
If you’re planning on installing pavers, it’s important to have a solid understanding of ground tension. Ground tension refers to the force that is exerted on the ground due to various environmental factors such as rain, wind, and temperature changes. This force can cause the ground to shift and settle, which can lead to problems with your paver installation.
One of the most important things to keep in mind when dealing with ground tension is proper drainage. If rainwater is not able to drain away from your pavers, it can cause the ground to become saturated, which can increase ground tension and lead to settling. This is why it’s important to ensure that your paver installation has proper drainage. You can achieve this by creating a slight slope that allows water to run off, or by installing a drainage system such as a French drain.
Another important factor to consider is the type of base material you use. The right base material can help distribute the weight of your pavers evenly across the ground, which can help reduce ground tension and prevent settling. Popular base materials include gravel, sand, and stone dust. The type of base material you choose will depend on the size of your paver project, as well as the type of pavers you are using.
Proper compaction is also essential for reducing ground tension. Before laying your pavers, it’s important to compact the base material thoroughly to ensure that it is firm and even. This helps to create a stable foundation that can withstand ground tension without shifting or settling.
In addition to these preventative measures, it’s important to keep an eye on your paver installation over time. If you notice any settling or shifting, it’s important to address the problem promptly to prevent further damage. This may involve adding more base material or adjusting your drainage system.
Ultimately, understanding ground tension is essential for a successful paver installation. By taking the time to choose the right base material, ensure proper drainage, and properly compact the ground, you can help prevent problems with ground tension and enjoy a beautiful and long-lasting paver installation.