What is patio chair webbing?
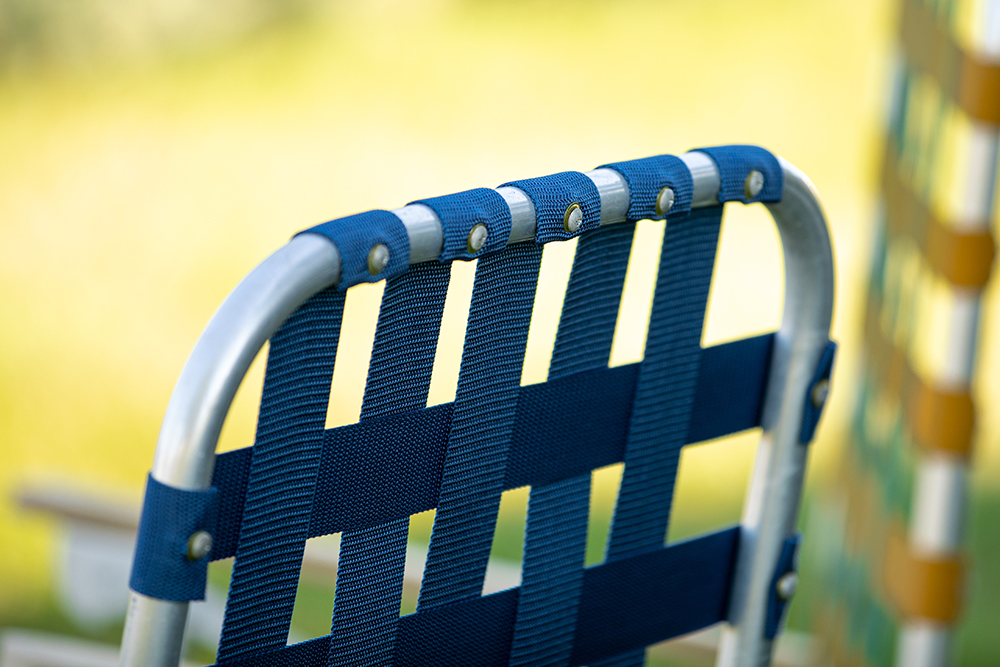
Patio chair webbing is the material that runs back and forth across the frame of a patio chair, providing the support and comfort for the seat and backrest. Over time, this webbing can become worn, faded or even break, leaving a chair that is unsightly and uncomfortable to sit on. However, replacing the webbing is a simple process that can be done by most people with just a few basic tools and some replacement webbing. In this article, we will guide you step-by-step on how to replace webbing on patio chairs.
Why do you need to replace the webbing?
If you are a fan of spending time relaxing on your patio chairs, you know how important it is to have functional and comfortable seating. However, over time, the webbing on patio chairs may begin to deteriorate due to exposure to the elements, wear and tear, or natural aging. This deterioration can lead to uncomfortable and unsightly chairs, which is why it’s essential to replace the webbing as soon as possible.
There are a variety of signs that your patio chair webbing needs to be replaced. For instance, if you notice fraying or tearing on the webbing, or if the webbing is sagging or broken, it’s time for a replacement. Additionally, if the color of the webbing has faded or turned brittle, it’s a clear indication that replacement is necessary.
In addition to discomfort and visual appeal, damaged webbing can also affect the overall functionality and safety of your patio chairs. The webbing provides support and stability for the chair frame and can affect your balance, causing you to fall or injure yourself.
Replacing the patio chair webbing is a task that can be done easily with the right tools and expertise. It’s an affordable and effective way to extend the life of your outdoor furniture and keep your patio looking fresh and inviting. you can also replace your patio cushions to look your chair fresh and nice.
In summary, replacing your patio chair webbing is essential to maintain the comfort, aesthetics, functionality, and safety of your outdoor space. Be sure to inspect your chairs regularly for signs of wear and tear and address any issues promptly to ensure you can continue to enjoy your patio chairs for years to come.
Materials Needed

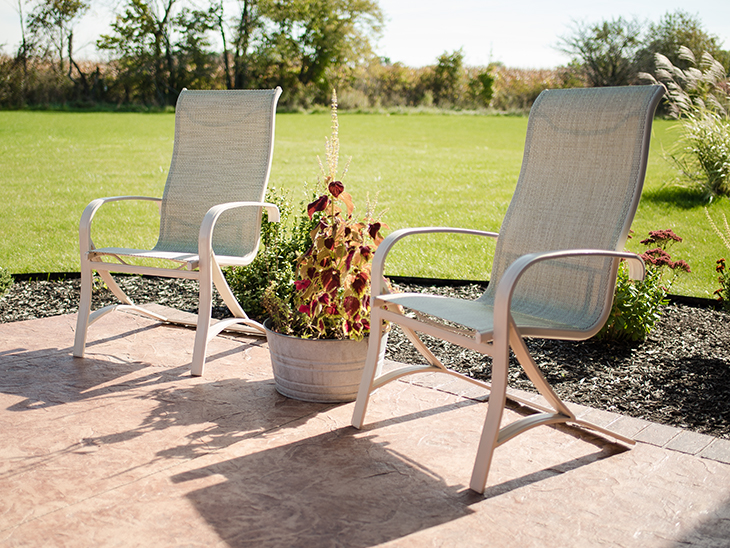
When it comes to replacing the webbing on your patio chairs, you’ll need a few key materials to get the job done right. First and foremost, you’ll need to choose the replacement webbing material that is best suited for your needs. Some popular options include vinyl strapping, cloth tape, and sling fabrics.
Vinyl strapping is a great choice for outdoor furniture as it is durable, weather-resistant, and comes in a range of colors and patterns. Cloth tape is another option that is easy to work with, although it may not be as long-lasting as vinyl. Sling fabrics are also popular for patio chair webbing replacement, as they are breathable and comfortable for seating.
In addition to the replacement webbing material, you’ll also need a few tools to help you with the task. A heat gun or boiling water can be used to soften the webbing and make it more pliable for installation. A dust cover can also be helpful to protect your furniture from scratches while you work.
Other tools you may need include a pair of scissors to cut the webbing to size, a cloth tape measure to ensure an accurate fit, and webbing clips or screws to secure the webbing in place.
With these materials and tools on hand, you’ll be well-equipped to tackle the task of patio chair webbing replacement. And best of all, you’ll be able to enjoy comfortable and safe outdoor seating for years to come!
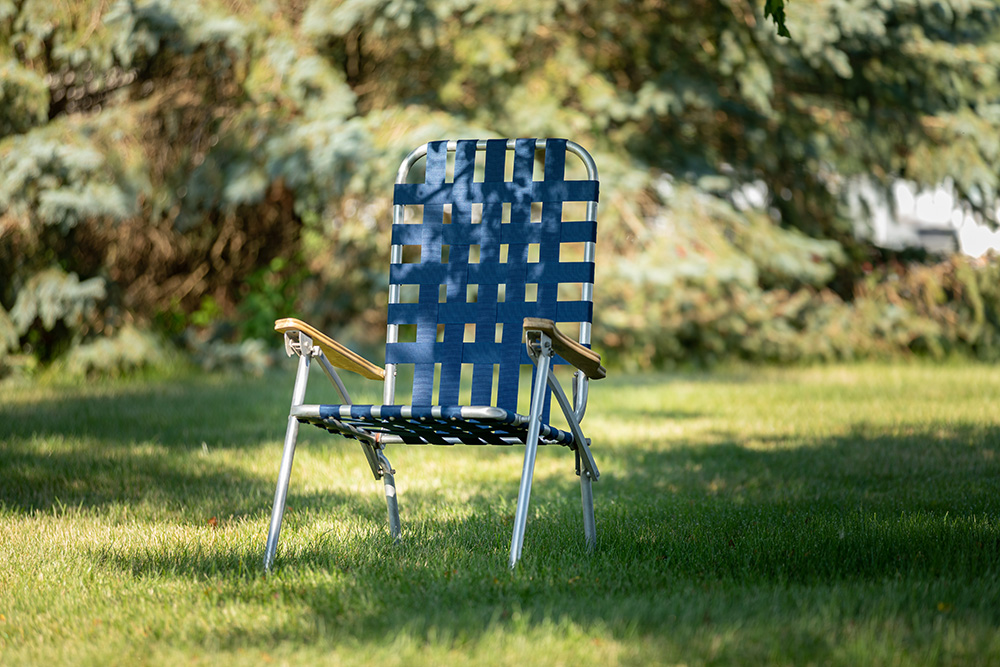
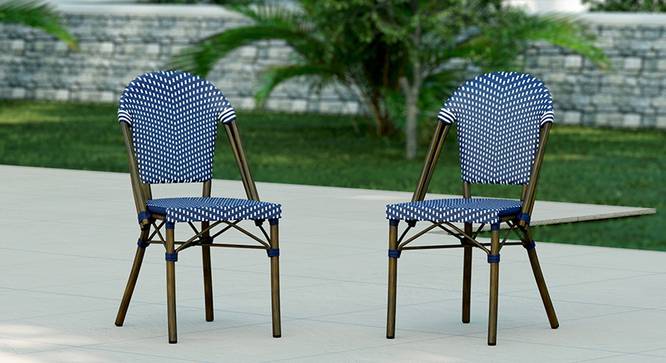
Chair Frame
A chair frame is the backbone of a chair. It is the structure that holds the seat, back, arms, and legs together. Chair frames can be made from several materials, including wood, metal, plastic, and wicker. Each material has its benefits and drawbacks, and the choice of material depends on several factors such as design, usage, and durability.
Wooden chair frames are traditional and versatile. They can be crafted from a range of wood types such as cherry, oak, or maple. Wooden frames offer durability, strength, and a classic, timeless design. They can be finished in various stains or paints to match your home décor. However, wooden chairs are susceptible to warping and cracking due to moisture and humidity.
Metal frames are durable and strong, making them ideal for outdoor furniture. They are resistant to rust and corrosion and can be designed in various shapes and styles. Metal frames are usually made from aluminum, stainless steel, or wrought iron. Aluminum is lightweight, low maintenance, and rust-resistant, making it a popular choice for outdoor chairs. Stainless steel is heavier and more durable, making it an ideal material for commercial seating. Wrought iron is a robust and sturdy material but can be challenging to move around.
Plastic frames are durable, lightweight, and affordable. Plastic chairs come in a range of colors, designs, and sizes, and are easy to clean. They are ideal for outdoor use and are resistant to moisture and humidity. However, plastic chairs can be less durable and sturdy than wood or metal chairs.
Wicker frames are an attractive option that provides a casual, relaxing atmosphere. They are typically made from woven rattan, willow, or bamboo fibers. Wicker offers decorative designs, and the weaving provides flexibility and comfort. However, wicker is not as durable as wood or metal and may be susceptible to cracking if not maintained properly.
In conclusion, the choice of chair frame material depends on your personal preference, usage, and durability requirements. Each material offers unique benefits, and you should choose the chair frame that best suits your needs. Proper maintenance of the chair frame can prolong its lifespan and ensure its durability and strength. With the right maintenance and care, your chair frame can provide comfort and support for many years.
Vinyl Straps or Webbing
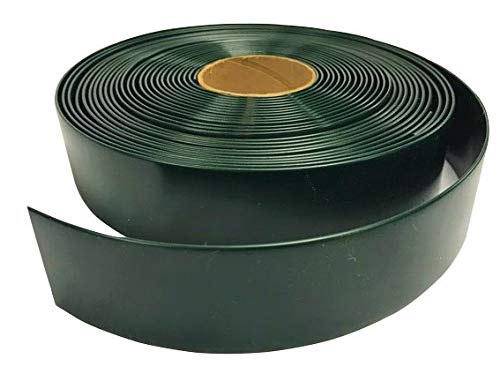
Vinyl straps or webbing are a popular choice for patio furniture because of their durability, flexibility, and color options. They are made from high-grade vinyl materials that resist fading, tearing, and mildew, making them an ideal choice for outdoor use.
Vinyl webbing is available in a range of colors and widths, making it easy to match your patio furniture to your outdoor space. Additionally, some vinyl webbing options come with a UV-resistant treatment, ensuring your furniture looks great for years to come.
Replacing webbing on your patio chairs is a straightforward process that can be completed in just a couple of hours with the right tools. First, remove any damaged or broken vinyl straps and measure the length and width needed for the replacement webbing.
Next, bring a pot of water to a boil and use tongs to hold the vinyl webbing in the hot water for a few seconds until it becomes pliable. Carefully place the softened webbing onto the chair frame and use a heat gun to further mold the vinyl to fit the chair.
For a no-sew patio chair webbing replacement, use webbing clips or screws to secure the vinyl to the frame. Alternatively, some replacement vinyl webbing comes with pre-drilled holes, making the process even easier.
Replacing your patio chair webbing can breathe new life into your favorite chairs, allowing you to enjoy your outdoor space comfortably and stylishly. With high-quality vinyl webbing and a little bit of experience in patio chair repair, you can have your chairs looking like new again in no time.
Cloth Tape Measure
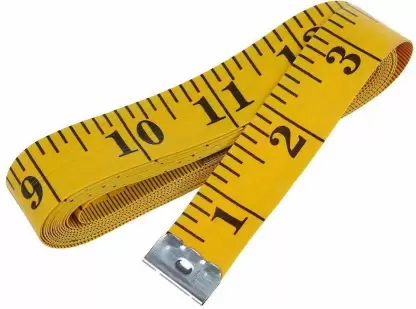
When it comes to measuring things like fabric, furniture, or even your own body, a cloth tape measure is an essential tool to have on hand. Unlike other types of measuring devices, cloth tape measures are soft and flexible, making them perfect for measuring curved or uneven surfaces.
One of the benefits of using a cloth tape measure is that it is typically more accurate than other types of measuring devices. This is because cloth tape measures are made from a flexible material that conforms to the surface being measured, reducing the risk of measurement errors.
Another advantage of using a cloth tape measure is that they are durable and long-lasting. Unlike plastic or metal measuring devices, cloth tape measures are less prone to breakage and can withstand frequent use. Additionally, they are easy to clean and can be stored in a compact space when not in use.
When shopping for a cloth tape measure, it is important to consider the length of the tape as well as the measuring units. Most cloth tape measures come in lengths ranging from 60 to 120 inches (or 1.5 to 3 meters), with both imperial and metric units of measurement available.
It is also worth noting that cloth tape measures can come in different widths. A wider tape measure may be more beneficial for measuring larger surfaces, while a narrower tape measure may be better suited for measuring smaller items.
In addition to standard cloth tape measures, there are also specialty tape measures available for specific purposes such as sewing and tailoring, construction, and even body measuring. These specialty tape measures may have additional features such as snap-on or retractable ends, magnetic tips, and brightly colored markings for easier readability.
Overall, a cloth tape measure is a versatile and practical tool to have in any household or workspace. Its flexibility, accuracy, and durability make it a valuable addition to any DIY tool kit or professional arsenal.
Heat Gun

A heat gun is a versatile tool that is commonly used for a variety of DIY projects. It is a handheld device that blows hot air onto surfaces, allowing users to manipulate and shape materials such as plastic, paint, and metal. Heat guns are available in a range of sizes and power levels, making them a popular choice for professionals and DIY enthusiasts alike.
One of the most common uses for a heat gun is to strip paint or remove old adhesive from surfaces. The heat causes the paint or adhesive to soften and bubble, making it easier to scrape away with a putty knife. This method is often less time-consuming and messy than using chemical strippers.
Heat guns can also be used to shrink wrap plastic or vinyl, like for packaging or sealing. They can also be used for soldering pipes, bending plastic, or shaping metal. Some heat guns come with additional attachments, allowing users to direct the airflow and temperature for specific applications.
When working with a heat gun, it is important to take proper safety precautions, such as wearing gloves and safety glasses to protect your hands and eyes from the hot air. It is also recommended to use the heat gun in a well-ventilated area to avoid inhaling any fumes.
It is important to choose the right heat gun for your specific project. Consider the size and power you need, as well as any special features or attachments that may be beneficial for your application. With the right heat gun and proper safety measures in place, you can tackle a wide range of DIY projects with ease.
Dust Cover/Tarp/Old Sheet

If you’re in need of a quick and easy way to protect your belongings from dust and debris, a dust cover, tarp, or old sheet could be just what you need. These simple options are often overlooked, but they can be extremely effective at keeping your items clean and free of unwanted dust and debris.
A dust cover, tarp, or old sheet works by creating a barrier between your belongings and the outside world. By covering your items with one of these materials, you can keep them protected from dirt, dust, and debris that can accumulate over time. This is especially helpful if you’re storing items in a garage or shed, where they may be exposed to the elements.
Dust covers, tarps, and old sheets come in a range of sizes and materials, so you can choose the one that best suits your needs. If you’re looking for a low-cost option, an old sheet or tarp from a home improvement store may be just what you need. However, if you’re looking for a more durable and long-lasting option, a dust cover made from heavy-duty materials may be a better choice.
One of the great things about these options is that they can be reused over and over again. Simply shake them out or wash them off when they get dirty, and they’re ready to be used again. Plus, they’re easy to store when not in use, taking up minimal space in your garage or storage area.
Overall, using a dust cover, tarp, or old sheet can be a simple and effective way to protect your belongings from dust and debris. Whether you’re storing items long-term or just need a temporary solution, these options can provide the protection you need without breaking the bank.
Boiling Water (Optional)

Boiling water has long been used as a tool for various household tasks, including cooking, cleaning, and even outdoor activities. But did you know that boiling water can also be used as an optional step in replacing the webbing on your patio chairs?
When replacing webbing on patio chairs, the first step is to remove the old webbing and clean the chair frame. But before installing the new webbing, some experts recommend using boiling water to help soften the vinyl straps and make them easier to work with.
To use boiling water in this process, simply bring a pot of water to a boil on the stove, then carefully pour the hot water over the vinyl straps. Allow the straps to soak in the hot water for a few minutes, then remove them from the water and let them cool slightly before installing them on the chair frame.
While boiling water is optional in this process, it can be particularly helpful when working with stubborn or stiff vinyl straps. However, it’s important to use caution when handling boiling water to avoid burns or other injuries.
In addition to making webbing replacement easier, boiling water can also be useful in other DIY projects around the home. For example, it can be used to remove labels and stickers from jars and other items, to sanitize kitchen utensils and cutting boards, and even to help kill weeds in your garden.
Whether you choose to use boiling water in your patio chair webbing replacement project or in other areas of your home, it’s a versatile and accessible tool that can make a variety of tasks more manageable. Just remember to take precautions as needed and handle it with care.
Color Options (Optional)
When it comes to replacing webbing on your patio chairs, there are several factors to consider – one of which is the color of the new webbing. While this may seem like a minor detail, the right color choice can greatly enhance the overall look of your outdoor space.
Most retailers that sell replacement webbing for patio chairs offer a range of color options to choose from. This allows you to select a color that complements your existing patio furniture, or even create a whole new color scheme. Some popular shades for patio chair webbing include neutral colors like beige, gray, and black, as well as brighter hues like blue, green, and red.
When selecting a color for your new webbing, it’s important to consider both function and style. For example, if you have young children or pets that frequently use your best patio furniture, a darker color may be more practical to help hide dirt and stains. On the other hand, if you want to create a bold, eye-catching look, a brighter or contrasting color may be the way to go.
In addition to color options, you may also want to consider the material of the new webbing. Vinyl is a popular choice for its durability and weather resistance, but there are also options like nylon or polyester webbing that may be better suited for certain climates or types of outdoor furniture.
Ultimately, the color and material of your replacement webbing are up to you and your personal style preferences. With a wide range of options available, you’re sure to find the perfect combination to enhance the look and functionality of your patio chairs.
Preparing the Chair Frame for Replacement Webbing
When it comes to replacing webbing on patio chairs, the first step is to prepare the chair frame for the new webbing. This involves removing any old or damaged webbing, as well as any other parts that may be in the way.
One important tool for this process is a heat gun, which can be used to soften and loosen the old webbing so that it can be removed more easily. Simply apply heat to the webbing until it becomes pliable, then use a screwdriver or other tool to pry it away from the chair frame.
If the webbing is particularly stubborn or has been secured with clips or screws, you may need to use a pair of pliers or wire cutters to remove it. Be careful not to damage the chair frame or any other parts during this process.
Once you have removed all of the old webbing, take a moment to inspect the chair frame for any damage or wear. This is also a good time to clean the frame if it is dirty or dusty.
If there are any loose or broken screws or other parts, replace them before continuing with the new webbing installation. You’ll also want to make sure that any clips or other hardware are securely fastened and in good condition.
Finally, measure the length of the chair frame where the new webbing will be installed. This will help you determine how much webbing you will need and ensure a snug, professional-looking fit.
Overall, preparing the chair frame for replacement webbing is an essential first step in the process. With the right tools and a little bit of care, you can ensure that your patio chairs look and function like new for years to come.
Remove Existing Webbing and Save It for a Template
If you’re planning on replacing the webbing on your patio chairs, it’s important to remove the existing webbing carefully and without damaging it. One reason for this is that you can use the old webbing as a template for the new webbing, which will save time and ensure a proper fit.
To remove the webbing, you can start by loosening any clips or screws that are holding it in place. If the webbing is relatively new and still in good condition, you may be able to remove it without damaging it.
Once you have removed the webbing, take a moment to examine it carefully. If it’s still in good condition, you can use it as a template for the new webbing. This means you won’t have to measure the chair frame or guess at the length of the webbing needed. Simply use the old webbing as a guide to cut the new webbing to the correct length and width.
If the old webbing is damaged or worn, you can still use it as a template by cutting away the damaged parts and using the intact sections as a guide for the new webbing.
To make sure the template is accurate, you should lay it out flat and measure its length and width. Then, use a cloth tape measure to transfer these measurements to the new webbing.
Once you’ve cut the new webbing to the correct length and width, you can use clips or screws to secure it in place on the chair frame. If you’re using clips, be sure to space them evenly to ensure a snug fit.
By removing the existing webbing carefully and using it as a template, you can save time and ensure a professional-looking result when you replace the webbing on your patio chairs. Plus, you’ll be able to recycle the old webbing instead of throwing it away.
Prepare the Chair Frame by Cleaning and Sanding if Necessary
Before you begin the process of replacing the webbing on your patio chairs, it’s important to prepare the chair frame by cleaning and sanding it if necessary. This step is essential to ensure that the new webbing properly adheres to the chair frame and doesn’t become loose or sag over time.
To clean the chair frame, begin by removing any dirt or debris that may have accumulated on the surface. You can use a soft-bristled brush to gently scrub away any loose dirt or dust. For harder-to-remove stains or grime, consider using a mild soap solution and a sponge.
After cleaning the chair frame, you may need to sand it down to create a smooth and even surface for the new webbing to adhere to. This can be particularly important if the old webbing has left behind any adhesive residue or if the chair frame has any rough or uneven areas.
To sand the chair frame, begin by using a medium-grit sandpaper to remove any rough or uneven spots. Then, switch to a finer-grit sandpaper to create a smooth and even surface. Make sure to sand the entire chair frame, paying particular attention to any areas where the new webbing will be attached.
Once you have finished sanding the chair frame, it’s important to wipe away any dust or debris that may have accumulated. You can use a clean cloth or a tack cloth to remove any remaining particles.
By taking the time to properly clean and sand the chair frame before replacing the webbing, you can ensure that the new webbing will be securely attached and will provide a comfortable and durable seating surface for your patio chairs. With a little bit of effort and attention to detail, you can easily restore your favorite chairs to their former glory and enjoy your outdoor space to the fullest.
Measuring Patio Chair Webbing Replacement Pieces
When it comes to replacing the webbing on your patio chairs, one of the most important steps is measuring the replacement pieces. This will ensure that the new webbing fits the chair properly and is able to provide the necessary support and stability.
To measure the replacement webbing, you will need a few tools. These may include a cloth tape measure, scissors, and a pen or marker. It’s also important to have the exact dimensions of the chair frame and the old webbing, if possible. This will help you determine the length and width of the new webbing needed.
Begin by measuring the length of the old webbing. This can be done by laying it out on a flat surface and using the tape measure to measure from one end to the other. Make sure to measure the entire length of the webbing, including any folds or curves.
Next, measure the width of the old webbing. This can be done by laying the webbing flat and measuring its width with the tape measure. Make sure to measure at the widest point of the webbing.
Once you have measured the old webbing, use these measurements as a guide for cutting the replacement pieces. Make sure to leave extra length on each end of the new webbing. This will allow you to securely attach it to the chair frame.
In addition to the length and width, you may also need to consider the thickness and material of the replacement webbing. Some materials, such as vinyl strapping, come in a range of thicknesses and colors. Make sure to choose a material and thickness that is suitable for your outdoor space and that matches the original webbing as closely as possible.
Measuring the replacement webbing pieces may seem like a small step, but it is crucial to the success of your patio chair repair project. By taking the time to measure carefully, you can ensure that your new webbing fits snugly and securely, providing you with a comfortable and durable seating option for your outdoor space.
Take Measurements of Strap Lengths From Your Saved Template
Once you have successfully replaced the webbing on your patio chairs, it’s important to ensure that the length of the new straps are correct for a secure fit. To do this, you can take measurements of the strap lengths from your saved template.
Your saved template is essentially a guide that indicates the correct length and positioning of the webbing on the chair frame. This template can be made using your old webbing or a piece of cardboard that has been cut to match the shape of the chair frame.
To take the measurements, start by laying out the chair frame on a flat surface with the webbing facing up. Use a tape measure to measure the length of each strap, starting from where it’s attached to the chair frame to where it reaches the other end.
It’s important to measure each strap individually, as they may differ in length due to their position on the chair frame. Make sure to label the measurements next to each strap on your template to avoid confusion.
Once you have taken all the measurements, compare them to your saved template to ensure that they match. If any of the measurements are off, you may need to adjust the strap length by cutting it down or adding extra material.
It’s important to note that getting the correct strap length is crucial for the overall stability and comfort of the patio chair. Poorly fitted straps can result in a wobbly chair that is uncomfortable to sit on and can even be a safety hazard.
In conclusion, taking measurements of strap lengths from your saved template is an important step in ensuring that your patio chairs are properly fitted and comfortable to sit on. By following these steps, you can enjoy a well-fitted and sturdy outdoor furniture that will last for years to come.