What is a Gravel Patio?
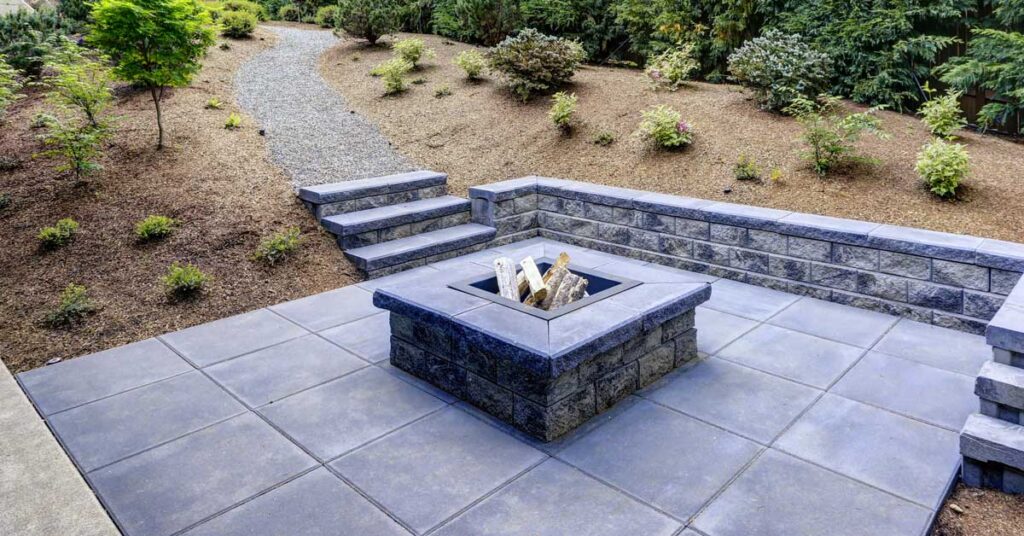
A gravel patio is a beautiful and practical addition to any outdoor space. It is a cost-effective way to create an elegant and natural-looking patio area without spending a lot of money. Gravel patios are often used as a central gathering space or a transitional space between the house and the garden. They can also be used to enhance the overall landscape design of your home.
Gravel patios are made up of layers of different materials stacked on top of each other. The first layer is a solid base made of either compacted gravel or sand. This layer prevents water from seeping through the patio and also provides a firm surface for the patio’s construction. The level base is crucial as it helps to create an even surface that’s safe for walking on and ensures that the patio is free from cracks or sinkholes.
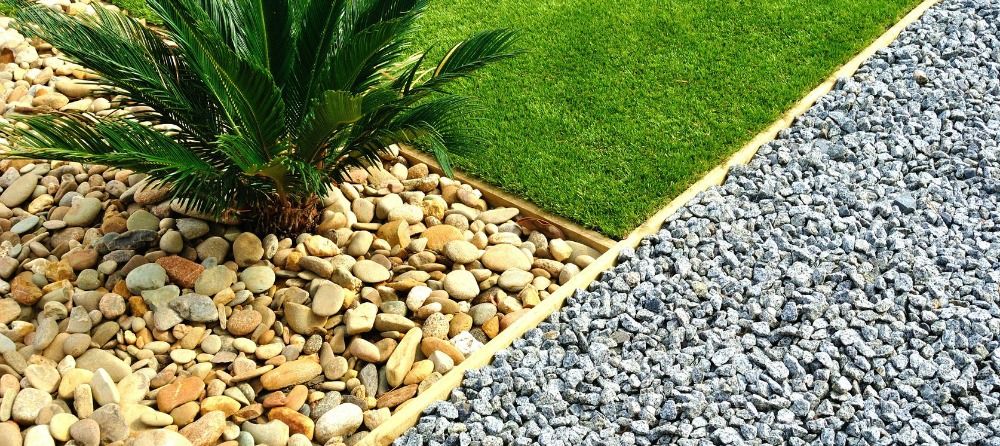
After the base layer has been laid, a layer of landscape fabric is then placed over it. This fabric acts as a weed barrier, preventing any weeds from growing through the gravel and keeps the patio looking neat and tidy. The next layer is the gravel itself, commonly known as pea gravel. This type of gravel is rounded, smooth, and is available in a range of colors and sizes. It is spread evenly over the landscape fabric, usually about 2-3 inches deep.
The installation process of a gravel patio is relatively simple and can be done without professional help. All you need is a metal rake, a few other garden tools, and a weekend to get the job done. However, it’s crucial to ensure that there are no utility lines or irrigation lines beneath the surface where you plan to implement the patio.
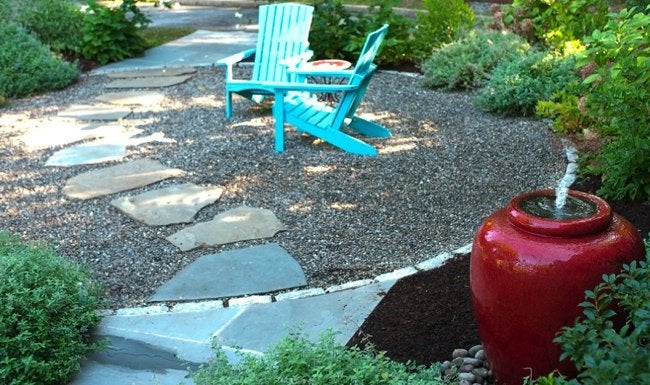
One of the best things about gravel patios is that they are natural-looking and blend well with the surrounding landscape. The natural weathering of the gravel over time adds to its charm and character. It’s also an excellent option for those who wish to make their outdoor space more accessible, as pea gravel offers grip and relatively low slip potential compared to concrete patios.
In conclusion, if you’re looking to create a beautiful and functional outdoor living space, a gravel patio may be an affordable option for you. Gravel patios require little upkeep and offer a variety of colors and sizes to meet your design preferences. When installed correctly, they provide a solid base and efficient water drainage. With a little creativity and DIY help, you can create an idyllic outdoor space for your relaxation and entertainment.
Benefits of a Gravel Patio

A gravel patio can be a great addition to any outdoor space, providing a number of benefits that are worth considering. Here are just a few of the many advantages of installing a gravel patio.
First and foremost, gravel patios are affordable options. Compared to other materials, such as concrete pavers or flagstones, gravel patios are relatively inexpensive, even when purchased in bulk. This makes them an excellent choice for those who are working with a limited budget or who want to save money on their landscaping projects.
Another advantage of a gravel patio is that it’s easy to install. While some landscaping projects can be quite complex and require the help of a professional landscape contractor, gravel patios can often be completed as a DIY project over a single weekend. All you need is some basic gardening tools and some elbow grease.
Gravel patios are also incredibly versatile. With a variety of colors and sizes to choose from, you can easily find the perfect type of gravel to complement your outdoor space and existing landscaping. Furthermore, the natural appearance of the gravel blends in well with the surrounding environment and can create a beautiful, organic look that’s hard to replicate with other materials.
Durability is another key benefit of a gravel patio. Pea gravel is a very durable material and can withstand heavy foot traffic without showing signs of wear and tear. Plus, it’s easily maintainable. Regular raking will keep it looking tidy, and adding another layer of gravel as needed is a simple maintenance task.
Finally, a gravel patio can help with water drainage. Unlike harder, non-porous materials like concrete, gravel allows rainwater to seep through the surface and stay out of your yard. This can help prevent water from pooling around your house or in your yard, which can lead to mold, mildew, and other water damage problems.
In summary, a gravel patio is an affordable, easy-to-install, durable, versatile, and low-maintenance option for anyone looking to improve their outdoor space. With its unique texture, natural appearance, and ability to mitigate water drainage, it’s definitely worth considering when planning your next backyard DIY project.
Preparation
Preparation is the key to any successful project, and that certainly applies to creating a gravel patio. Before you begin the installation process, there are some important steps you need to take to ensure a solid and long-lasting base for your patio.
The first step is to measure the space where you want to build your patio. This will help you determine the amount of gravel you’ll need and the size and shape of your patio. It’s important to account for any curves or angles in your design and make sure you have enough space for outdoor furniture or planters.
Next, you need to prepare the area where you’ll be laying the gravel. Weed growth can undermine the stability of your patio, so it’s important to remove any grass or weeds and create a level base. Use a metal rake or garden hoe to remove any obstructions and level the soil. For larger patios or if you have poor soil quality, you may want to consider adding a layer of base material, such as crushed rock or sand. The base layer should be about 4-6 inches deep and provide a solid foundation for your gravel.
Once you have the base prepared, it’s time to add a layer of fabric to prevent weed growth and improve drainage. You can use either landscaping or weed barrier fabric, which is available in a range of widths. Cut the fabric to fit the dimensions of your patio space and lay it over the top of the soil or base material. Make sure there are no gaps or overlaps in the fabric that could allow weeds to grow through.
Now it’s time to add the gravel. Choose the type of gravel that best suits your needs, whether it’s pea gravel, rounded stones, or another type. Plan on spreading the gravel to a depth of about 2-3 inches deep for maximum stability and drainage. Use a rake or shovel to spread the gravel evenly over the entire patio space. Add more gravel as needed until the entire patio is covered and you have the desired depth.
Finally, take some time to water the gravel to settle it into place and give it a natural weathering appearance. This will help your patio to look more natural and blend in better with the surrounding environment. Water the gravel thoroughly and then let it dry for a few days before using the patio.
In conclusion, taking the time to prepare the area properly will ensure that your gravel patio lasts for many years and provides a beautiful and functional outdoor space. With these preparation steps, you’ll be able to enjoy your new patio with confidence.
Measuring the Space
One of the most crucial steps when building a gravel patio is to measure the space where you want to build it. Measuring the area of your patio enables you to determine the amount of gravel you will need, the size and shape of your patio and the type of patio furniture or accessories that can fit in your outdoor space. You can also give your patio a beautiful look by installing different types of lights
Start by mapping out the area of the patio. Measure the length and width of your outdoor space and mark off the borders using stakes or string. If your patio has curves or angles, use a tape measure to measure the length of each curve or angle. This will help you determine the amount of gravel you need for each section of the patio.
When measuring the length and width of your patio, ensure that you add a few inches to the measurements to provide for borders around the gravel patio. Plan for at least a six-inch border around the perimeter of your patio to keep the gravel contained.
Consider the shape of your outdoor space when mapping out your patio’s area. If your lawn is irregularly shaped, adjust your measurements to accommodate the patio’s design. You may also want to consider how the patio will fit into your overall landscaping plan.
It’s also important to factor in how much weight the patio will need to hold. If you plan on hosting large outdoor gatherings or using heavy outdoor furniture, you will need to ensure that your patio can handle the extra weight. You may need to increase the depth of your gravel layer or use a thicker base material to provide additional support.
By taking careful measurements of your outdoor space, you can ensure that you have enough gravel and base materials for your patio and that it can accommodate your intended use. This will help you create a beautiful and functional outdoor space that the whole family can enjoy for years to come.
Clearing the Area
Clearing the area is the first step in creating a beautiful and functional gravel patio. Before you can begin laying down any base materials or gravel, you need to make sure that the area where the patio will be located is completely clear of any obstructions.
Start by removing any existing grass or vegetation in the area where the patio will be located. You can use a variety of tools to do this, including a shovel, hoe, or garden rake. If the area is covered in thick or stubborn vegetation, you may want to consider using a powered tool such as a weed whacker or brush cutter.
Once the vegetation is removed, it’s important to check the level of the ground to ensure that it’s even. Use a level to check the surface of the ground in all directions. If there are any high or low spots, you may need to fill them in or remove excess soil to ensure that the surface is level.
If there are any hard surfaces in the area where the patio will be located – such as concrete or asphalt – you may need to use a jackhammer or other demolition tool to break up and remove the surface. This will create a better base for your patio and allow for proper drainage.
Finally, it’s important to consider any utility or irrigation lines that may run through the area where the patio will be located. Make sure to mark the location of any lines so that they can be avoided during the installation process.
By taking the time to clear the area properly, you’ll be setting the foundation for a beautiful and functional gravel patio that will provide years of enjoyment.
Laying Down Landscape Fabric or Weed Barrier
If you’re planning to create a gravel patio or want to prevent weed growth in your outdoor space, laying down landscape fabric or weed barrier is a crucial step in the installation process. This material acts as a barrier between the ground and the gravel or other landscaping materials that you’ll be using, preventing weeds and other plants from growing underneath.
There are several types of landscape fabric and weed barrier available, each with its own benefits and drawbacks. The most commonly used materials are woven or non-woven polypropylene fabrics, which are both durable and long-lasting. They come in various sizes and thicknesses and can be purchased in rolls or pre-cut to specific dimensions.
When installing landscape fabric or weed barrier, the first step is to clear the area where you’ll be laying it down. Remove any existing grass, weeds, or debris from the surface of the ground. Then, make sure the ground is level and moist, as this will make it easier to lay down and secure the material.
Next, lay down the landscape fabric or weed barrier over the area you want to cover. Make sure to overlap any seams by several inches and secure it with landscape staples or pins. You can also use rocks or other heavy objects to hold it in place until you add your landscaping materials on top.
When choosing the thickness of your landscape fabric or weed barrier, keep in mind that thicker materials offer better weed control but may limit water drainage. Thinner materials will allow for better water drainage but may not be as effective at preventing weed growth.
It’s also important to note that while landscape fabric and weed barrier can help prevent weed growth, they are not foolproof. Weeds can still grow on top of the fabric if seeds blow onto the surface or if the fabric becomes damaged or exposed over time. Regular maintenance such as removing any debris or fallen leaves from the surface of the fabric can help prevent weed growth.
Overall, laying down landscape fabric or weed barrier is an essential step in creating a low-maintenance and weed-free outdoor space. With the right materials and installation techniques, you can enjoy a beautiful and hassle-free outdoor area for years to come.
Installing a Base Layer of Pea Gravel
Installing a base layer of pea gravel is an essential step in creating a stable and long-lasting patio. A pea gravel patio can add a unique and charming touch to any outdoor space, but to ensure its durability and longevity, you need to start with a solid foundation.
To begin with, you’ll need to calculate the amount of pea gravel required for your patio space. Measure the area you want to cover and determine the depth of the base layer you want to create. Typically, a base layer of pea gravel should be around 4-6 inches deep.
Once you have your measurements, you can order the right amount of pea gravel from a landscaping supply company or purchase it in bulk if available in your area. Some common types of pea gravel that work well as a base material include river rock, crushed granite, or limestone.
Before spreading the pea gravel, you need to prepare the patio space properly. Remove any grass or vegetation from the area and level the ground using a metal rake or shovel. Consider adding some landscape fabric or weed barrier over the surface to prevent weed growth and maintain your base layer’s stability.
Once you have a level and weed-free surface, it’s time to start spreading the pea gravel base layer. Begin by laying down 2-3 inches of gravel on the surface and using a rake or shovel to spread it evenly across the area. Then use a hand tamper or plate compactor to compress the pea gravel layer and create a solid and sturdy foundation.
Repeat this process until you build a base layer that is 4-6 inches in depth, making sure to tamp down and compact the layer after each addition. You can then add a layer of sand on top of the pea gravel and level it out, creating a smooth and even surface for the final layer of gravel or pavers.
By laying down a base layer of pea gravel, you’re providing a solid and well-draining foundation for your patio, which will ensure its stability and durability. With proper installation and regular maintenance, your pea gravel patio can last for years and provide a beautiful and functional outdoor space for you and your family to enjoy.
Materials Needed for Installation

If you’re planning to install a gravel patio, there are a few essential materials that you’ll need to have on hand to ensure a successful and long-lasting installation.
First and foremost, you’ll need to decide on the type of gravel you want to use for your patio. Common types of gravel used for patios include pea gravel, crushed stone, river stone, and granite. Each of these options has its own unique texture, color, and durability, so it’s important to choose the type of gravel that best suits your needs and preferences.
Next, you’ll need to determine the amount of gravel you’ll need for your patio. This will depend on the size of your patio, as well as the depth of the gravel layer you plan to install. You can use an online gravel calculator or consult with a landscaping supplier to determine how much gravel you’ll need for your project.
Once you have your gravel selected and your measurements determined, you’ll need to gather a few additional materials to prepare your site for installation. These may include:
– Landscape fabric: This is a woven fabric that helps to prevent weed growth and maintain stability in your gravel layer.
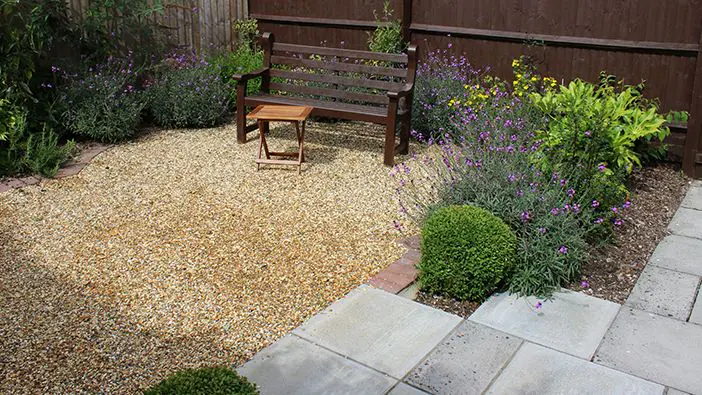
– Edging material: You may want to install edging around the perimeter of your patio to help contain the gravel and prevent it from spilling onto surrounding areas.
– Base material: Depending on the condition of your patio site, you may need to add a layer of base material (such as crushed stone or sand) before laying your gravel layer to ensure proper drainage and stability.
– Hand tamper or plate compactor: These tools will help you compact your gravel layer to create a stable, long-lasting surface.
– Shovels and rakes: These standard gardening tools will be essential for spreading and leveling your gravel layer.
Finally, keep in mind that there may be additional costs associated with your gravel patio installation, such as renting equipment or hiring a landscape contractor to assist with the project. With the right materials and proper preparation, however, you’ll be well on your way to enjoying your new outdoor space!
Amount of Gravel Needed (Cubic Yardage)
When planning to create a gravel patio, it’s essential to determine the amount of gravel you’ll need for your project. One key measurement to consider is cubic yardage. This determines the total volume of gravel required to fill the patio space you have in mind.
To determine the cubic yardage of your space, start by measuring the length and width of your patio area in feet. Multiply these two measurements to get the total square footage of your space. For example, a patio that is 10 feet by 20 feet would have a total square footage of 200 square feet.
Next, you’ll need to measure the depth of gravel you want to install. This typically falls between 2-4 inches for a standard gravel patio. Once you have your desired depth in inches, divide this number by 12 to convert it to feet. For example, if you want a gravel layer that is 3 inches deep, you would divide 3 by 12 to get 0.25 feet.
To calculate the cubic yardage of your space, multiply your total square footage by the depth in feet. Continuing our example, a 200 square foot patio with a 0.25 foot gravel layer would need 50 cubic feet of gravel. To convert this to cubic yards, divide the total cubic feet by 27 (the number of cubic feet in a cubic yard). In this case, you would need approximately 1.85 cubic yards of gravel to fill your 200 square foot patio with a 0.25 foot layer of gravel.
Keep in mind that these measurements are just a starting point and can vary depending on a variety of factors, including the type of gravel you choose and any additional layers or base materials you need to install. It’s always best to consult with a professional or use an online calculator to ensure you have accurate measurements and the right amount of gravel for your project.
Type of Gravel to Use

When it comes to building a gravel patio, choosing the right type of gravel is crucial. Different types of gravel offer varying levels of durability, aesthetics, and drainage capabilities. Here are some of the most common types of gravel used for patio projects:
Pea Gravel: Pea gravel is a popular option for patios thanks to its rounded and smooth texture that is easy on bare feet. It is also relatively inexpensive, making it an excellent option for those on a budget. However, it can be prone to weed growth and may require a layer of landscape fabric to prevent weeds from poking through.
Crushed Stone: Crushed stone is made by crushing large rocks into smaller pieces. This type of gravel comes in various sizes and colors, with crushed granite and limestone being popular choices. Crushed stone is significantly more durable than pea gravel and can withstand heavy foot traffic and weathering.
River Rock: River rock is another popular option for patios, thanks to its natural weathering and unique colors and shapes. River rock can range from pea-sized to larger rocks and can create a beautiful, natural-looking space. However, it can be more expensive than other types of gravel and may require additional leveling to create a flat patio surface.
Decomposed Granite: Decomposed granite (DG) is a type of gravel that is made up of small granite particles. It usually comes in a reddish-tan color and can create an elegant and sophisticated look in a patio setting. DG is relatively low maintenance and requires little to no weed control, but it can be dusty and may require additional watering to prevent dust from becoming airborne.
When selecting the type of gravel for your patio, it is essential to consider your budget, desired aesthetic, and environmental conditions. Consult with a landscape contractor or a sales representative at your local gravel supplier to help determine which type of gravel is best for your patio project.
Metal Rake and/or Shovels
Metal rakes and shovels are essential tools for any gardener or landscaper. These tools are designed to help you move soil, sand, gravel, and other materials with ease. They come in various shapes and sizes, making them versatile tools that can be used for different tasks.
The primary purpose of a metal rake is to level or smooth out a surface. It is made up of a long metal handle or shaft and a set of sharp metal teeth or prongs at the other end. These teeth can be flat or pointed and spaced close together or far apart. The type of rake you choose will depend on the surface you’re working on and the type of materials you’re moving.
For example, a lawn rake is specifically designed to help you remove dead grass, leaves, and other debris from your lawn. The teeth on a lawn rake are typically spaced farther apart to avoid damaging the grass. Similarly, a garden rake has shorter, sharper teeth that make it easier to level soil, remove rocks, and spread compost.
Shovels are another essential tool for any landscaper or gardener. They come in various shapes and sizes, with different blade shapes and handle lengths. The most common type of shovel is the round-point shovel, which has a curved blade that is designed for digging. You can use it to dig holes for plants, create trenches for irrigation lines, or move soil from one area to another.
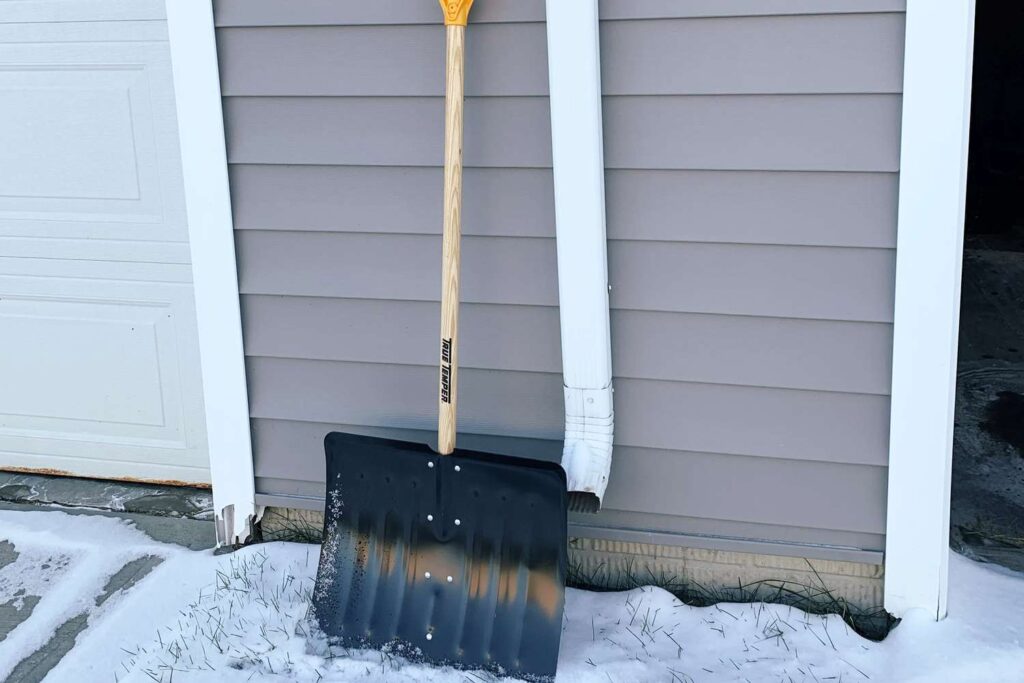
Other types of shovels include spades, which have a flat blade that is ideal for slicing through soil, and snow shovels, which have a large scoop-shaped blade that can be used to clear snow from driveways, sidewalks, and other areas. Like rakes, the type of shovel you choose will depend on the task at hand.
In conclusion, metal rakes and shovels are two essential tools for anyone who works outdoors. They can help you create a level, polished surface for your patio or garden, move soil and other materials, and make quick work of digging holes and trenches. When choosing a metal rake or shovel, consider the type of work you’ll be doing and choose a tool that is suited to that task. With the right tools in hand, you’ll be able to tackle any outdoor project with ease.
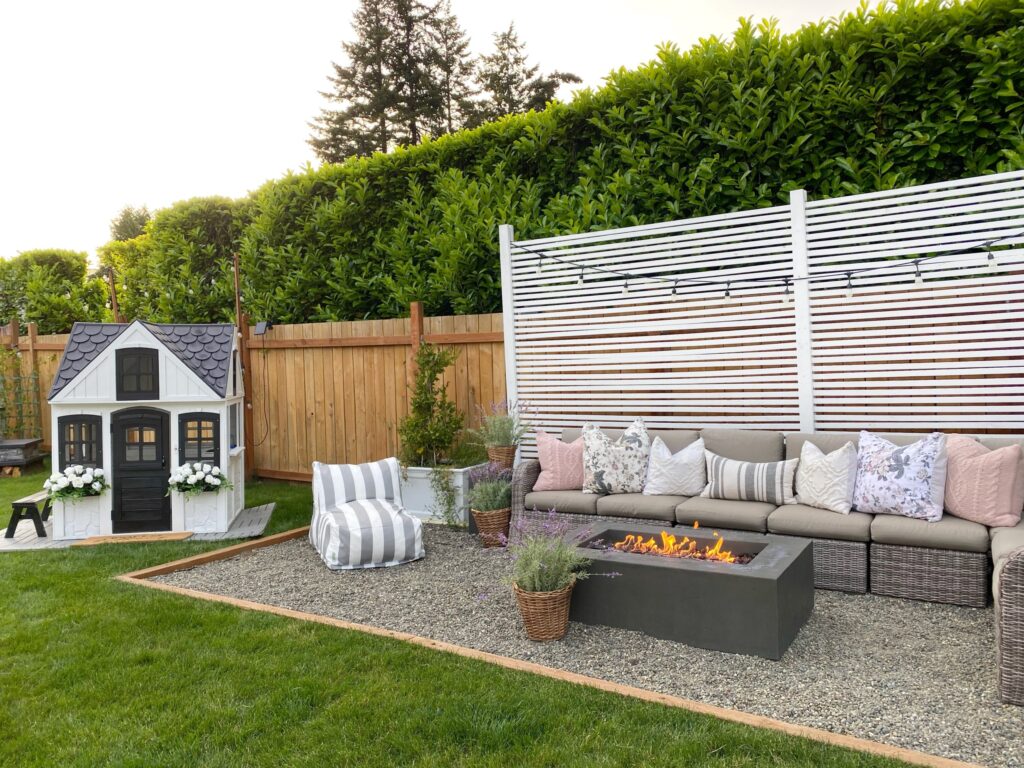
Optional Items (Concrete Pavers, Outdoor Furniture, etc.)
In addition to the necessary base materials for a gravel patio, there are several optional items that can enhance the function and aesthetic of your outdoor space.
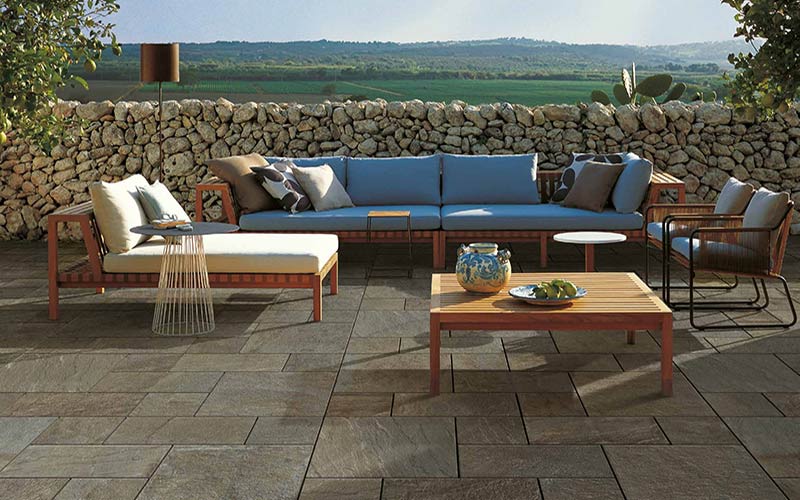
Concrete pavers are a popular option for creating a defined area within a gravel patio. They can be used to create a border, a pathway, or a patio space for outdoor furniture. Concrete pavers come in a variety of shapes, sizes, and colors, allowing for customization to fit your personal style and needs.
Outdoor furniture is another excellent addition to a gravel patio. Whether you’re looking for a cozy seating area or a place to dine al fresco, outdoor furniture can transform your outdoor space into a comfortable and inviting area. Choose furniture made from weather-resistant materials to ensure durability and longevity.
In addition to functional items, there are also decorative elements that can add visual interest to a gravel patio. Decorative rocks, potted plants, and outdoor lighting are all options for sprucing up an outdoor space.
It’s important to keep in mind the size and layout of your patio space when considering optional items. You don’t want to overcrowd the area with too much furniture or decorations, but also don’t want the space to feel bare and unused.
Lastly, it’s worth noting the importance of affiliate links and DIY projects when it comes to building your gravel patio. By purchasing materials through affiliate links, you can support content creators while also ensuring you’re getting quality products. DIY projects also allow for customization and cost savings, as many of the base materials and optional items can be installed by knowledgeable homeowners.
Overall, whether adding concrete pavers, outdoor furniture, or decorative elements, optional items can take a simple gravel patio and transform it into a functional and beautiful outdoor space for you and your guests to enjoy.
Installation Process
The installation process is a crucial step when it comes to creating a durable and functional gravel patio. It’s important to follow a few key steps to ensure your patio is built to last.
Firstly, the area where the patio will be installed should be thoroughly cleared of any grass, roots, or debris. It’s also important to check for any underground utility lines or irrigation systems that may be present in the area. Once the area is clear, a solid and level base is necessary to prevent any sinking or shifting of the gravel.
The base layer should consist of a compacted layer of crushed stone or gravel, which can be up to 4-6 inches deep. This layer will provide ample support for the gravel and help with water drainage. A metal rake can be used to ensure the base is level before it’s compacted with a plate compactor or hand tamper.
After the base layer is complete, a layer of landscaping fabric or weed barrier should be laid down. This will help prevent weed growth and keep the gravel from sinking into the soil over time. The fabric should be tightly butted together and secured in place with landscape staples.
Next, the pea gravel can be spread out evenly over the entire patio space. The depth of the gravel layer will depend on the desired finished look and functionality of the space, but typically ranges from 2-4 inches. Some homeowners prefer to use a mixture of different types of gravel to add visual interest and texture to the patio.
Once the gravel is spread out, it’s important to compact it with a plate compactor or hand tamper. This will help to eliminate any air pockets and create a more stable surface. Finally, a border or edging can be installed to prevent the gravel from spreading into surrounding areas.
Overall, the installation process for a gravel patio requires attention to detail and careful planning. By following these steps, homeowners can create a beautiful and functional outdoor space that will last for years to come.
Conclusion
In conclusion, understanding the importance of a well-developed conclusion is crucial for any writer. A strong conclusion not only leaves a lasting impression on the reader but also gives closure to the topic at hand. It is the final opportunity for the writer to leave a lasting impact and assert the ultimate purpose of their writing.
When crafting a conclusion, writers should aim to summarize the main points of their argument while tying the ideas together in a cohesive manner. They should also avoid introducing any new ideas or arguments, as this can lead to confusion and undermine the overall impact of the piece.
Furthermore, writers should consider the tone of their conclusion and ensure that it aligns with the intended audience and purpose of their writing. For example, an academic paper may require a more formal and reserved conclusion, while a piece of creative writing may benefit from a more emotive and reflective tone.
Overall, a well-developed conclusion can elevate a piece of writing from good to great. By summarizing the main points, providing closure, and leaving a lasting impression, writers can effectively communicate their ideas and solidify their message in the minds of their readers. As such, it is important to give the conclusion the time and attention it deserves to truly make an impact.