Purpose of the Article
The purpose of this article is to provide readers with a comprehensive guide on how to hang string lights on their patio without using nails. Many homeowners love the idea of having outdoor patio lights to create a cozy and inviting atmosphere in their outdoor living space, but they often struggle to find a solution that doesn’t involve drilling holes or using nails.
In this article, we will discuss various methods and tools that you can use to hang string lights on your patio without damaging the walls or siding. We’ll cover adhesive hooks, gutter hooks, cup hooks, duct tape, and other methods that will allow you to create ambient lighting on your patio or backyard without compromising on aesthetics.
We’ll also cover different types of string lights, including incandescent bulbs, solar-powered string lights, battery-powered string lights, commercial-grade string lights, and more. We’ll discuss different bulb shapes and sizes, such as globe bulbs, lantern-style bulbs, and edison-style bulbs, and help you choose the one that best suits your needs and preferences.
At the end of this article, you’ll have a clear understanding of how to hang string lights on your patio without nails, and you’ll be able to create an impromptu and decorative lighting pattern for your outdoor living space. So, keep reading to learn about the different tools and techniques available to help you achieve your desired lighting effect!
Overview of String Lights
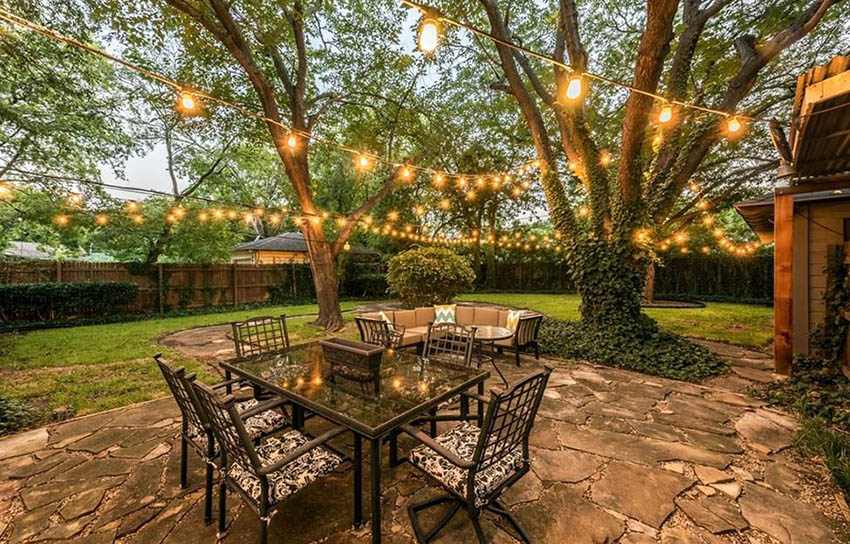
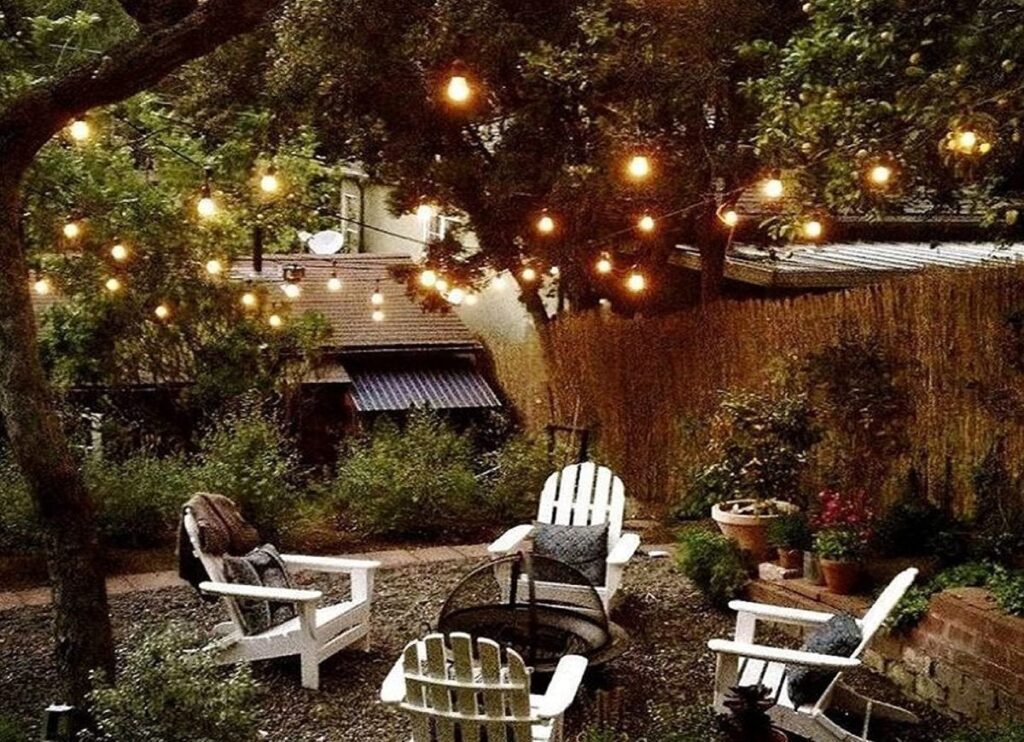
String lights, also known as fairy lights or patio lights, are a popular type of outdoor lighting that has become a staple of many backyard and patio setups. These lights typically consist of a long strand of small bulbs connected by a wire, creating a warm and ambient lighting effect when hung overhead or draped around trees and structures.
There are many different types of string lights available on the market, ranging from classic incandescent bulbs to more modern and energy-efficient LED lights. Incandescent bulbs, while not as energy-efficient as their LED counterparts, emit a warm and inviting glow that many homeowners prefer. LED lights, on the other hand, are more energy-efficient, which can be a great option for those looking to save on their electricity bills.
String lights also come in different shapes and sizes, including globe bulbs, lantern-style bulbs, and edison-style bulbs. Globe bulbs emit a soft, diffused light that creates a cozy and inviting atmosphere. Lantern-style bulbs, with their intricate and delicate patterns, add a touch of elegance to any space. Edison-style bulbs, with their vintage and industrial look, are a favorite among those looking to create a rustic and charming ambiance.
When it comes to installation, there are many ways to hang string lights without using nails, including using adhesive-backed hooks, cup hooks, or gutter hooks. Additionally, many string lights come with their own light suspension kit, which includes everything you need to easily and securely hang your lights.
In conclusion, string lights are a versatile and beautiful way to add ambiance and warmth to your outdoor space. With a variety of bulb types, sizes, and installation options to choose from, there’s a perfect string light option for every style and taste.
Choosing the Right String Lights
Choosing the right string lights can make all the difference in creating the perfect ambiance for your outdoor space, whether it’s for a romantic evening on the patio or hosting a backyard bash. With so many different options available, it may be overwhelming to determine which string lights are best suited for your needs.
First, consider the type of bulb you want. Incandescent bulbs emit a warm, inviting glow, but they may not be as energy-efficient as LED bulbs. LED bulbs come in a variety of colors and are more energy-efficient, making them a great option for those looking to save on electricity bills.
Next, think about the shape and style of the bulb. Globe bulbs emit a soft, diffused light, while lantern-style bulbs can add a touch of elegance to any space. Edison-style bulbs are a popular choice for those seeking a rustic and vintage look.
Once you have determined the type of bulb and style you prefer, consider the length of the light strand and the space you want to cover. Patio string lights come in sets of various lengths and bulb counts to suit different needs. Be sure to measure your space and determine how much light coverage you need before making a purchase.
Finally, think about the installation method. Adhesive-backed hooks can be a great option for those without a lot of hanging space, while cup hooks and gutter hooks can provide a secure and sturdy installation method. Some sets of string lights come with their own light suspension kit, making installation a breeze.
In summary, when choosing the right string lights, consider the type of bulb, style, length, and installation method. With the right choice, your outdoor space will be transformed into a warm and inviting oasis that you’ll love spending time in.
Types of String Lights

When it comes to lighting up your outdoor space, string lights are a great option. There are many different types of string lights available, each with their own unique look and advantages.
One popular type of string lights is the traditional incandescent bulb. These bulbs emit a warm, inviting glow that can create an intimate ambiance in your outdoor living space. However, they may not be as energy-efficient as other options and may have a shorter lifespan.
Another option is LED string lights. These bulbs are more energy-efficient and come in a variety of colors and styles, making them a versatile option for any outdoor space. They may have a higher upfront cost, but they can save you money on your electricity bill in the long run.
Globe bulbs are a popular choice for those looking for a soft, diffused light. They offer a subtle ambiance that can create a cozy atmosphere in your outdoor space. Globe bulbs come in a variety of sizes and shapes to suit any preference.
For a rustic and vintage look, Edison-style bulbs are a great option. They offer a warm, amber glow that can add charm and character to any space. Edison bulbs are often larger and bulkier than other types of bulbs, so be sure to consider the weight and size before installation.
Finally, there are solar-powered string lights. These lights are eco-friendly and require no electrical outlet or power source. They charge during the day and turn on automatically at night. They may not provide as much light as other options, but they can create a beautiful and impromptu light in your outdoor space.
In conclusion, there are many different types of string lights available, each with their own unique look and advantages. Consider your style and needs when choosing the right type of string lights for your outdoor living space.
Selecting a Power Source
When it comes to installing outdoor string lights without nails, choosing the right power source is crucial. Depending on your outdoor living space, you may have access to different types of power sources. Here are some options to consider:
1. Electrical outlet: If your outdoor space has an electrical outlet, this is perhaps the easiest and most reliable power source. Simply plug in the light strands and you’re good to go. However, if your outlet is far from where you want to hang your lights, you may need an extension cord.
2. Battery-powered string lights: If you don’t have access to an electrical outlet or want to avoid electrical wiring altogether, battery-powered string lights may be a great option. These lights are portable and can be hung anywhere, as long as you have a sufficient amount of batteries. The downside is that you may need to replace batteries frequently, so this option may not be the most cost-effective in the long run.
3. Solar-powered string lights: Solar-powered string lights are a great eco-friendly option, as they charge during the day and turn on automatically at night, without the need for an electrical outlet or batteries. However, they may not provide as much light as other options and may not work well in areas with limited sunlight.
Once you’ve decided on a power source, you’ll need to make sure the light strands are compatible. Some lights come with a specific plug type or require a specific voltage, so be sure to check the product specifications before purchasing. Additionally, make sure the power source and light strands are rated for outdoor use to ensure safety.
Overall, selecting the right power source can make all the difference in ensuring your outdoor string lights are functional and safe. Consider your options carefully and choose the one that works best for your outdoor living space.
Deciding on Location and Length of Strands
Now that you have your power source sorted out, it’s time to decide on the location and length of your light strands. The right placement and length of your strands can make a big difference in creating the perfect ambiance for your outdoor space.
First, consider the overall layout of your outdoor space. Where will people be sitting or gathering? Are you looking for a more intimate feel or do you want to create a brighter, more festive atmosphere? Figuring out the answers to these questions will help you determine where to hang your lights and how long each strand should be.
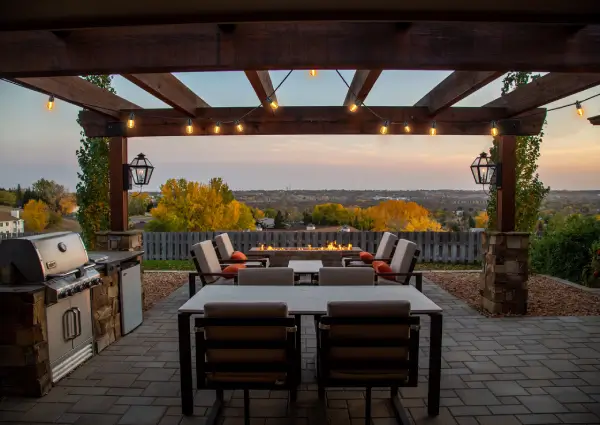
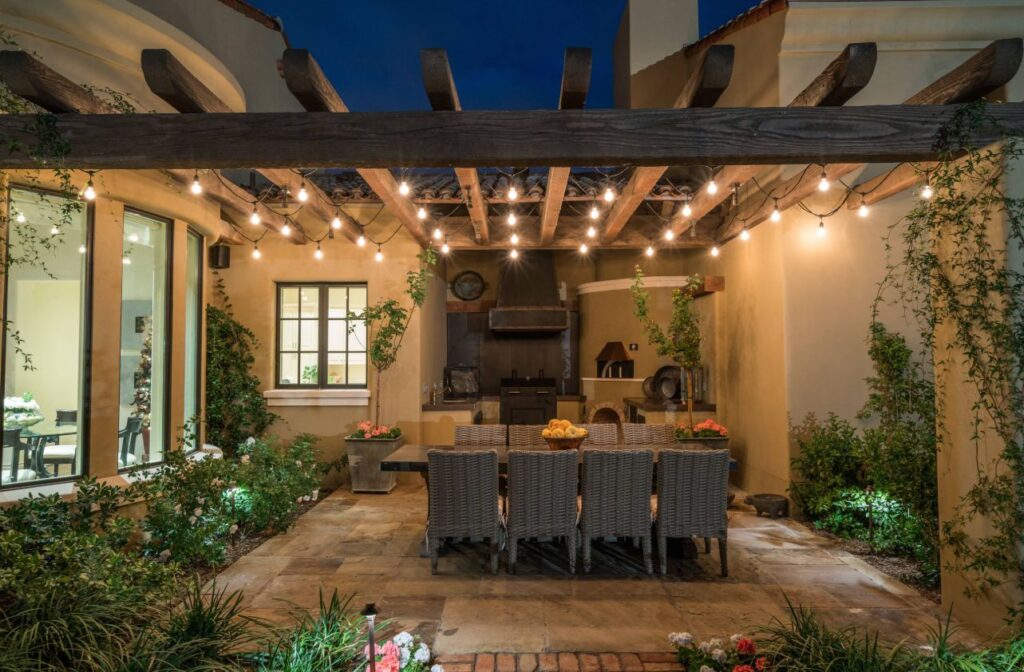
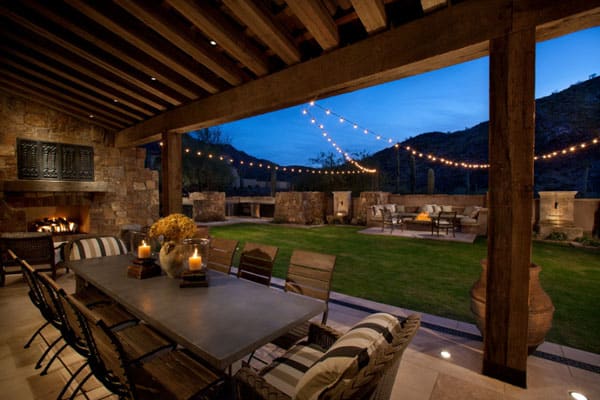
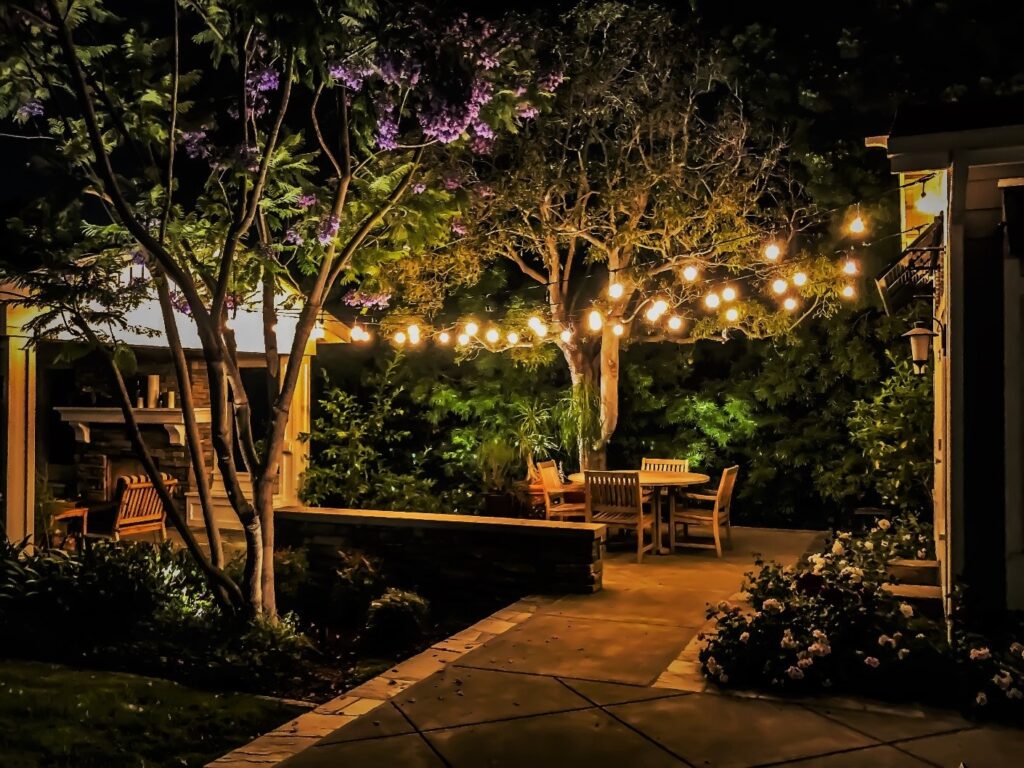
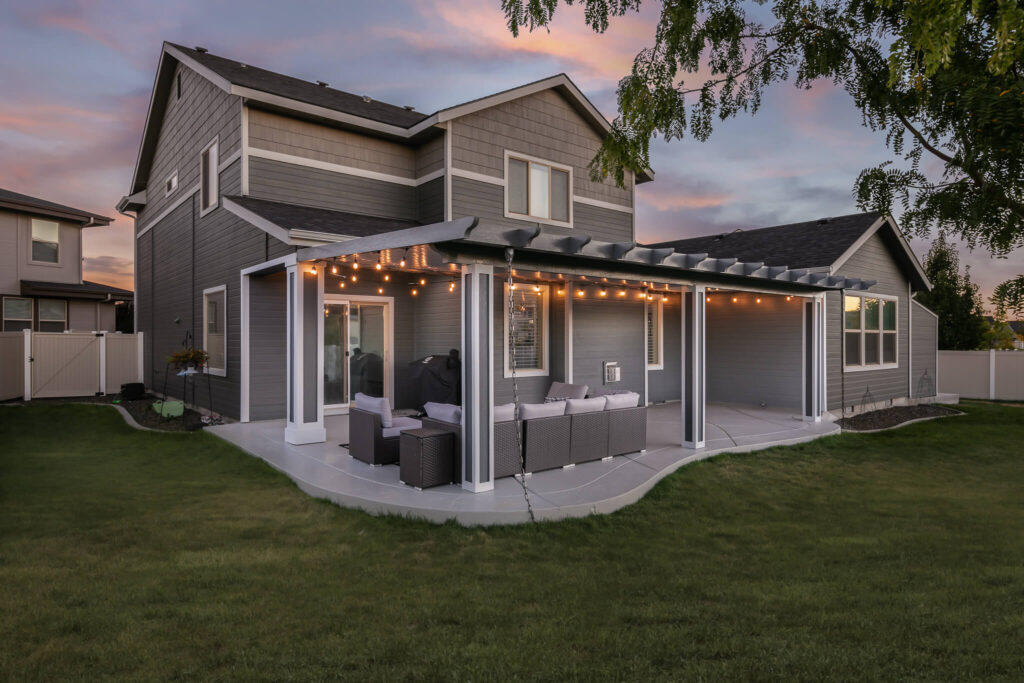
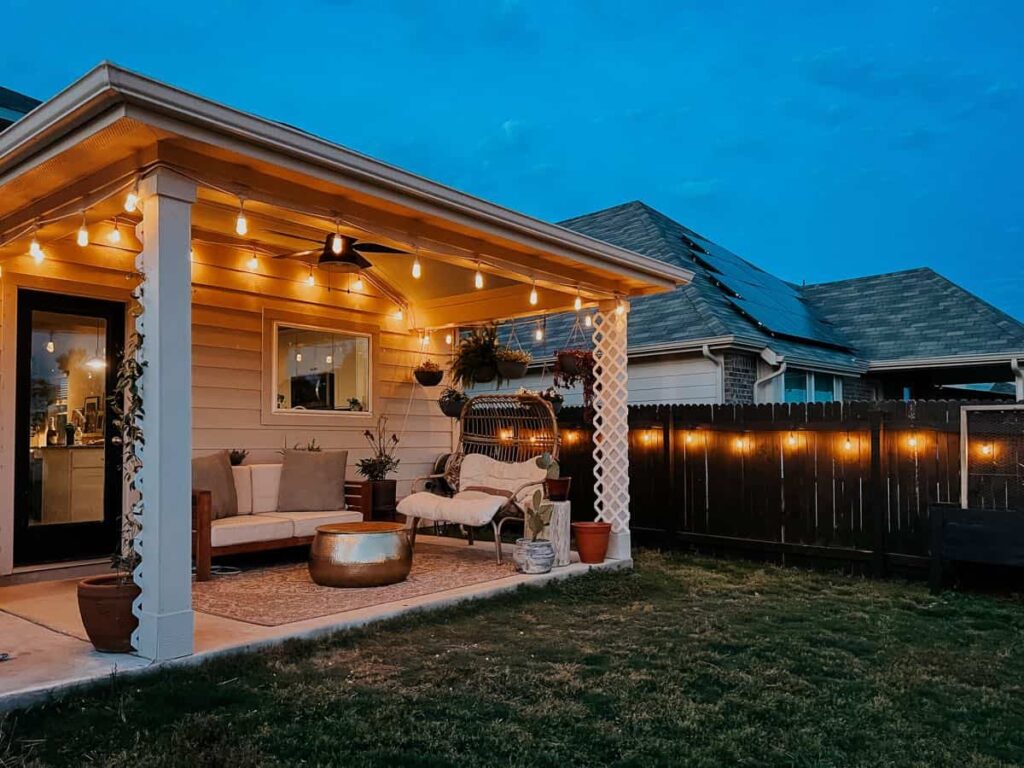
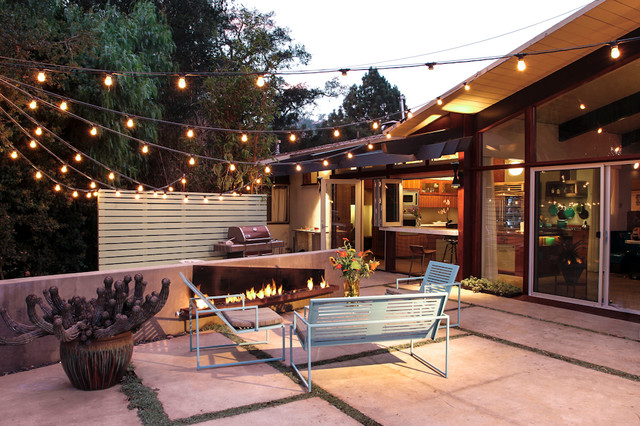
If you have a covered patio or pergola, consider hanging your strands across the ceiling for a cozy, intimate feel. Alternatively, hanging strands along the fence or between trees can help create a more expansive, festive atmosphere. Just be sure to measure the length of the area you want to cover so you know how many strands to purchase.
When it comes to the length of your strands, keep in mind that shorter strands may be easier to work with, but longer strands can create a more dramatic effect. Also, consider the overall size of your outdoor space. If you have a large area to cover, longer strands may be necessary to achieve the desired effect. On the other hand, smaller spaces may look overcrowded with too many strands.
If you’re using multiple strands to cover a large area, be sure to connect them properly and consider the weight of the strands. Using cup hooks or adhesive-backed hooks can help keep the strands securely in place.
Overall, deciding on the location and length of your light strands is an important step in creating the perfect outdoor ambiance. Take some time to consider the layout of your space and the atmosphere you want to create, and you’ll be on your way to a beautiful outdoor lighting display.
Preparing Your Patio for Hanging String Lights
When it comes to transforming your outdoor space into a cozy and inviting retreat, few things can create a more magical atmosphere than hanging string lights. Whether you’re hoping to create a romantic ambiance for a date night or looking to host an outdoor dinner party, outdoor string lights can bring a touch of whimsy and charm to any space. However, before you start stringing lights from tree to tree or across your patio ceiling, it’s important to prepare your patio for this fun DIY project. Here’s what you need to do:
1. Start by assessing your patio space.
Take a good look at your outdoor space and think about the areas where you’d like to hang string lights. Consider the size of your patio, the layout of your furniture, and the style you’re aiming for. For example, if you have a small patio, hanging fewer strands of lights may be preferable to avoid a cluttered look. Alternatively, if you’re hoping to create a glam, upscale vibe, you may want to opt for commercial-grade string lights with larger bulbs.
2. Plan your light placement.
Once you’ve assessed your space, it’s time to plan where you’ll hang your lights. Think about the visual effect you want to achieve and plan accordingly. Most people find it helpful to draw a rough sketch of their patio and mark where they want to hang each strand of lights.
3. Check your power source.
Before you start hanging lights, figure out where you’ll be plugging them in. Do you have an electrical outlet on your patio, or will you need to run an extension cord from inside? Make sure you have a plan in place and check that your power source can handle the number of strands you plan to use.
4. Gather your materials.
Hanging string lights will require a few key tools, including cup hooks or adhesive hooks, measuring tape, and a ladder. You may also want to have a friend or family member on hand to help you, as this is a two-person job.
5. Test your hooks.
Before you start hanging the lights, it’s important to test your hooks to make sure they’re secure. Hang a weight from each hook to ensure that it can handle the weight of the lights. This will prevent any damage or accidents down the road.
By taking the time to properly prepare your patio, you can ensure that your string lights will be safely and beautifully strung from every hook. With a little planning and effort, you can create the perfect ambiance and transform your outdoor space into a cozy and comfortable retreat.
Measuring and Mapping Out Where to Hang the Strings
Once you’ve assessed your outdoor space and decided on the visual effect you want to achieve, it’s time to start measuring and mapping out where to hang your outdoor string lights without nails. This step may seem tedious, but it’s crucial for creating the perfect ambiance on your patio or outdoor living space.
First, grab a tape measure and measure the distance between the areas where you plan to hang the string lights. Be sure to measure the vertical distance as well as the horizontal distance. This will help you determine how much string you’ll need and how high you can hang the lights.
Next, mark where you plan to hang each strand of lights on your outdoor patio. You can use small pieces of tape or marker to mark the location. Alternatively, you can draw a rough sketch of your outdoor space and mark the locations on the sketch.
Once you have marked all the locations, it’s time to map out the string path. This step will help you determine how much string you’ll need and how you’ll run it between the areas you marked. To do this, start by drawing lines between each marked location to create a rough string path. This will allow you to see the areas that might need additional support and ensure that you have enough string to cover your outdoor space.
Now that you have a rough map of where you’ll hang your outdoor string lights, it’s time to start hanging them. This process can be done with cup hooks or adhesive hooks. If using adhesive hooks, make sure the surface you’re placing them on is clean and dry before sticking them on.
In conclusion, measuring and mapping out where your outdoor string lights will hang is an essential step in achieving the perfect ambiance for your outdoor living space. Take the time to plan ahead and sketch out a rough map of where you’ll hang your strings, and you’ll be rewarded with a beautiful and inviting outdoor space perfect for entertaining or relaxing.
Preparing the Surface for Adhesive Hooks or Gutter Hooks
When it comes to hanging outdoor string lights, adhesive hooks or gutter hooks can be a great solution for those who don’t want to use nails. However, using these hooks requires some preparation of the surface where they will be placed. Here are some tips for preparing the surface for adhesive hooks or gutter hooks:
1. Clean the Surface: Before placing adhesive hooks or gutter hooks, it’s important to ensure that the surface is clean and free from dirt, dust, and debris. Use a damp cloth or sponge to wipe down the surface and let it dry completely.
2. Choose the Right Surface: Not all surfaces are suitable for adhesive hooks or gutter hooks. Make sure the surface where you plan to hang your outdoor string lights is smooth, flat, and non-porous. Avoid placing hooks on textured or porous surfaces, as they may not adhere properly.
3. Use Rubbing Alcohol: To ensure a strong bond between the adhesive hook and the surface, it’s a good idea to wipe the area where you plan to place the hook with rubbing alcohol. This will remove any oils or residue that may prevent the hook from sticking properly.
4. Wait for Ideal Temperature: Adhesive hooks and gutter hooks work best at temperatures between 50°F and 105°F. Make sure the surface and hooks are at the ideal temperature before sticking them together. If the temperature is too cold, warm up the surface and hook with a hairdryer before sticking them together.
5. Apply Pressure: Once you’ve placed the adhesive hook or gutter hook on the surface, apply firm pressure for at least 30 seconds. This will ensure a strong bond between the hook and the surface.
By following these tips, you can prepare the surface for adhesive hooks or gutter hooks and hang your outdoor string lights without nails. Remember to always follow the manufacturer’s instructions when using these hooks, and never overload them with too much weight.
Setting Up Adhesive Hooks or Gutter Hooks Without Nails
Outdoor string lights are a great way to add some ambiance to your outdoor living space, especially during the summer months. But what do you do if you don’t have any trees to hang them from or you don’t want to damage the walls of your covered patio with nails? The solution is simple: use adhesive hooks or gutter hooks.
Adhesive hooks are a great option for those who want to hang their string lights without using nails. These hooks come in a variety of sizes and styles and can be easily installed on smooth, flat, and non-porous surfaces. However, in order to ensure that they stick properly, it’s important to clean the surface thoroughly before applying the hook. Use a damp cloth or sponge to wipe down the surface and let it dry completely. If you’re hanging the lights on a painted surface, make sure that the paint is completely cured before placing the hook.
Once the surface is clean and dry, wipe it down with rubbing alcohol to remove any oils or residue that may prevent the hook from sticking properly. Then, wait for the ideal temperature before applying the hook. Adhesive hooks work best between 50°F and 105°F, so make sure that the surface and hook are at the right temperature before sticking them together.
When applying the hook, be sure to press firmly for at least 30 seconds to ensure a strong bond. It’s also important to choose the right size and weight capacity for your string lights. Adhesive hooks come in different sizes and weight limits, so make sure you choose one that can support the weight of your light strands.
If you don’t have a smooth, flat, and non-porous surface to hang your string lights, gutter hooks may be a better option for you. These hooks can be easily installed on the edge of your gutter, allowing you to suspend your lights above your outdoor living space without damaging any walls or surfaces. However, it’s important to choose the right type of gutter hook for your gutters, as not all hooks may fit properly.
Overall, hanging string lights without nails is easy if you use adhesive hooks or gutter hooks. With the right preparation and installation, you can add some beautiful ambient lighting to your outdoor living space without damaging any surfaces.
Using Adhesive-Backed Hooks on Smooth Surfaces
One of the easiest and most effective ways to hang string lights on a patio without nails is by using adhesive-backed hooks. These hooks are specifically designed to stick to a variety of surfaces and provide a strong, reliable hold for your light strands.
If you have a smooth surface, such as a metal or glass patio railing, adhesive-backed hooks can provide an easy solution for you to hang your lights. These hooks typically come in a variety of sizes and weight limits, so it’s important to choose the right hook based on the size and weight of your light strands.
Before applying the hook, it’s important to make sure that the surface is clean and dry. You can use a damp cloth or sponge to wipe down the surface and then let it dry completely. If the surface is painted, it’s important to make sure that the paint is completely cured before applying the hook.
Once the surface is clean and dry, you can apply the adhesive-backed hook by removing the backing and pressing it firmly onto the surface for at least 30 seconds. It’s important to choose a hook with a weight capacity that can support the weight of your light strands, as this will help to ensure that the hook stays in place.
Adhesive-backed hooks are a great option for those who want to hang their string lights without any permanent damage to their patio or outdoor living space. Additionally, these hooks are easy to remove and can be repositioned as needed, making them a flexible and convenient option for any outdoor lighting setup.
Overall, using adhesive-backed hooks on a smooth surface can be a great way to hang your string lights without nails or any other permanent installation methods. With the right hooks and a little bit of preparation, you can create a beautiful and ambient outdoor living space that you can enjoy all year round.
Installing Gutter Hooks on Gutters and Shingles
Installing string lights on your outdoor space is a great way to create a cozy and inviting ambiance. However, traditional hooks and nails may not be the best option, especially if you don’t want to leave permanent marks on your gutters or shingles. Fortunately, gutter hooks are a great alternative that can hold your string lights without causing any damage. In this article, we’ll guide you through the process of installing gutter hooks on your gutters and shingles.
First, let’s talk about the materials you will need. You’ll need a ladder, gutter hooks, light strands, and a power source (either an outdoor outlet or an extension cord). It’s always a good idea to measure out the length of your gutters beforehand to know how many hooks you will need.
To install gutter hooks on your gutters, start by positioning your ladder near the area of your gutters where you want to hang your lights. Make sure the ladder is stable and secure before climbing up to avoid any accidents. Once you’re in place, attach the gutter hook by opening the hook and clasping it onto the edge of the gutter. Make sure the hook is secure and can hold the weight of your light strand.
Next, take your light strand and thread it through the gutter hook. If your gutter is particularly deep, you may need to use a ladder or pole to thread the light strand through the hook. Once the strand is secure, move on to the next gutter hook and repeat the process.
For shingle installation, you’ll need to use clips that are designed to attach to your shingles. These clips typically have a small hook that allows you to attach your light strands easily. Start by positioning the clip onto the shingle and clasping it onto the edge. Make sure it’s securely attached before threading the light strand through it.
When done correctly, installing gutter hooks and shingle clips can be an effective and easy way to hang your string lights without any permanent damage to your gutters or shingles. However, it’s important to note that some gutter hooks and clips may not be strong enough to hold heavier light strands, so it’s important to choose hooks and clips with a weight limit that can support the weight of your lights.
In conclusion, gutter hooks and shingle clips are an excellent option for installing string lights on your outdoor space without causing any permanent damage. By following these simple steps, you can enjoy beautiful ambient lighting without any worries.
Alternatives to Hanging String Lights Without Nails
When it comes to creating an ambient and inviting outdoor space, string lights are a popular choice among homeowners. However, not everyone wants to put holes in their walls or surfaces with nails. Fortunately, there are a few alternatives to hanging string lights without nails that can achieve the same effect.
Adhesive Hooks: Adhesive hooks are a popular alternative to using nails. These hooks can attach to flat surfaces, such as walls, and are strong enough to hold light strands. They are easy to install and can be removed without causing any damage to the surface.
Gutter Hooks: Gutter hooks are an excellent option for those with gutters. These hooks can attach to the edges of the gutter and allow you to thread the light strands through them. They are easy to install and can be removed without causing any damage to the gutter.
Pole-Mounted Hooks: For those without a flat surface to attach adhesive hooks or gutter hooks to, pole-mounted hooks may be a good option. These hooks can be attached to poles, fences, or other vertical surfaces and can hold light strands. They are easy to install and can be removed without causing any damage to the surface.
Tension Rods: Tension rods can be used to hang light strands between two walls or surfaces. These rods are adjustable and can be tightened to hold the light strands in place. They are easy to install and can be removed without causing any damage to the walls or surfaces.
Light Suspension Kit: A light suspension kit can be used to suspend light strands from trees, pergolas, or other outdoor structures. These kits typically include cables or wires that can be attached to the structure and support the light strands. They are easy to install and can be removed without causing any damage to the structure.
In conclusion, there are several alternatives to hanging string lights without nails. Adhesive hooks, gutter hooks, pole-mounted hooks, tension rods, and light suspension kits can all achieve the same effect as nails without causing any permanent damage to your outdoor space. Consider these options when planning your next outdoor lighting project.
Using Hot Glue Guns to Attach Strings to an Overhead Structure
When it comes to decorating an outdoor space with string lights, one of the most important considerations is how to attach them to an overhead structure. While gutter hooks, tension rods, and light suspension kits are all great options, using a hot glue gun can be a quick and easy solution for those who want to avoid drilling holes or using hardware.
To get started, you will need a high-temperature hot glue gun and a supply of hot glue sticks. Make sure to choose a gun that can handle outdoor temperatures and that is compatible with the size and shape of your light strands.
One of the advantages of using a hot glue gun is that it can be used to attach strings of lights to a wide variety of surfaces, including wood, metal, concrete, and even fabric. Start by measuring the length of your light strands and selecting the areas where you want to attach them. Use a tape measure or ruler to mark the spots where you will apply the glue.
Next, heat up your glue gun and apply a small amount of hot glue to the marked areas. Press the string of lights firmly into the glue, making sure it is securely attached. Repeat this process along the length of the string, spacing the attachments evenly and being careful not to apply too much glue in one spot.
It is important to note that hot glue does not work well on wet or dirty surfaces, so make sure the area you are working with is clean and dry. Additionally, hot glue can melt in extreme heat, so if you live in an area with particularly high temperatures, you may want to consider a different attachment method.
Overall, using a hot glue gun to attach string lights to an overhead structure can be a great solution for those who want a temporary or impromptu lighting setup. Quick and easy to use, it can provide ambient lighting and a cozy atmosphere for outdoor living spaces without the need for nails or drilling.
Wrapping Light Strands Around Pillars or Posts
When it comes to creating a warm and inviting outdoor space, one of the most effective ways to achieve an ambient atmosphere is by using string lights. While simply hanging them across your patio or backyard can certainly look nice, wrapping light strands around pillars or posts can take your lighting design to the next level.
Before getting started, it’s important to first measure the circumference of the pillars or posts you plan to decorate. This will give you an idea of how much string you’ll need and how many wraps around each column will be required.
One popular technique for wrapping light strands around pillars or posts is to start at the base and work your way up. Use a series of cup hooks or adhesive-backed hooks to secure the string to the column at the bottom, then wrap the strand around the column in a spiral pattern, spacing the wraps evenly.
As you work your way up the column, continue securing the string to the column with hooks as needed to keep the strand in place. This technique works particularly well for round or cylindrical columns, but can also be adapted for square or rectangular columns by wrapping the string around each side of the column.
Another option is to create vertical lines of light along the columns. This can be achieved by using a light suspension kit, which allows you to hang the string vertically from the top of the column. Alternatively, you can use hot glue or tape to attach the string to the column at regular intervals, creating a straight line of light running up the column.
When it comes to choosing light strands for wrapping around pillars or posts, there are a few factors to consider. First, make sure the strand is long enough to comfortably reach from the base of the column to the top. Additionally, consider the type of bulb you prefer – smaller fairy lights provide a subtle, delicate glow, while larger bulbs such as globe or Edison styles create a bulkier, more industrial look.
Wrapping light strands around pillars or posts is a great way to add depth and dimension to your outdoor lighting design. With a bit of planning and some creativity, you can easily create a stunning ambiance for your patio or backyard.