Why Do I Need to Fix the Crank?
A patio umbrella is a crucial component of your outdoor space, especially during summer. It provides you and your loved ones with ample shade and protects you from the sun’s harmful UV rays. However, even the best patio umbrellas may encounter problems after consistent use, such as a faulty crank.
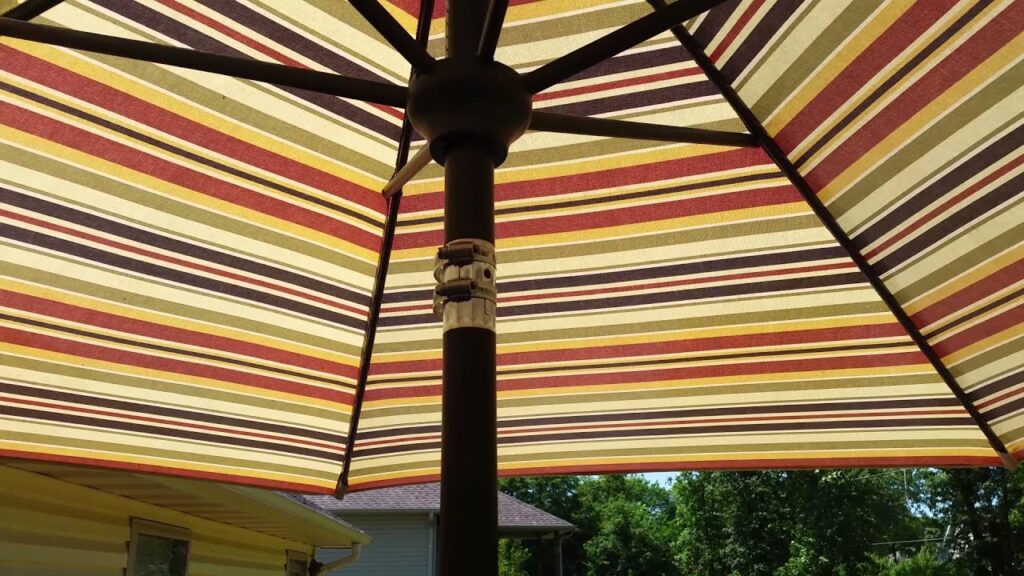
The crank is an essential part of the umbrella mechanism as it enables you to open and close the umbrella. When the crank is broken, opening and closing the umbrella becomes almost impossible, leaving you with an unusable patio umbrella.
Strong winds can be a notorious enemy to any patio umbrella, causing damage to the umbrella ribs, crank handle, or even the entire patio umbrella. Thus, fixing a broken crank as soon as possible is crucial to keep your patio umbrella functional.
A faulty crank can also be a significant safety hazard for those around it. If the crank mechanism is jammed or damaged to the point of becoming stuck, exerting too much force could cause the umbrella pole to snap, leading to a more significant risk of injury or damage to people or property.
Therefore, fixing the crank on your patio umbrella is a crucial aspect of maintaining outdoor safety and ensuring the longevity of your umbrella. With a working crank, you can comfortably and safely operate your umbrella, providing the necessary shade for your outdoor space.
In the next sections, we will discuss various methods of fixing the crank on your patio umbrella to ensure that you can continue to enjoy your outdoor space without any worries.
Types of Cranks
There are different types of cranks when it comes to patio umbrellas. Each crank is designed to work with a specific type of umbrella, and choosing the right one is crucial to ensure maximum functionality and ease of use. Here are some of the common types of cranks found in patio umbrellas:
1. Winding mechanism: This is the most basic type of crank used in patio umbrellas. It features a winding bolt that is turned to open and close the canopy. It is simple to use and highly effective, making it suitable for most standard umbrellas.
2. Handle crank: This type of crank is more advanced and features a handle that is used to raise and lower the canopy. It is commonly used in cantilever umbrellas and is easier to use than a winding mechanism.
3. Push-button crank: This is an automatic type of crank that features a push button that is used to open and close the canopy. It is commonly used in high-end patio umbrellas and is easy to use, making it ideal for people who prefer convenience.
4. Solar umbrella shade knob: This type of crank is found in solar umbrellas, and it is used to adjust the angle of the tilting canopy. It features a knob that is turned to adjust the angle of the solar panel, ensuring maximum sun exposure.
5. Wind-up crank: This type of crank is commonly used in commercial-grade patio umbrellas. It features a handle that is turned to open and close the canopy, making it easy to use and highly effective.
In conclusion, choosing the right type of crank for your patio umbrella is crucial to ensure maximum functionality and ease of use. Consider the size and type of your umbrella, as well as your personal preferences, when choosing a crank that works best for you.
Push Button Open/Close Mechanism

When it comes to patio umbrellas, there are a variety of different types of crank mechanisms available. One of the most popular and convenient options is the push-button open/close mechanism.
This type of mechanism is especially common in high-end patio umbrellas, as it offers a level of ease and convenience that other crank types may not provide. Rather than needing to physically turn a bolt or handle to open or close the umbrella, all you need to do is press a button.
This makes push-button mechanisms ideal for individuals who may have mobility issues or find traditional cranks difficult to operate. With just the press of a button, you can quickly and easily open or close your umbrella as needed.
Additionally, push-button mechanisms are typically quite reliable and durable. While other types of cranks may suffer from wear and tear over time, push-button mechanisms tend to function smoothly and consistently for years to come.
Of course, like any other type of crank mechanism, it’s important to make sure you’re using your push-button mechanism properly. Be sure to follow all manufacturer instructions carefully, and avoid any abrupt or forceful movements that could cause damage to the umbrella ribs or other components.
However, with proper use and care, a patio umbrella with a push-button open/close mechanism can be a fantastic addition to any outdoor space. If you’re looking to upgrade your current umbrella or invest in a new one, this type of mechanism is certainly worth considering.
Manual Crank Handle
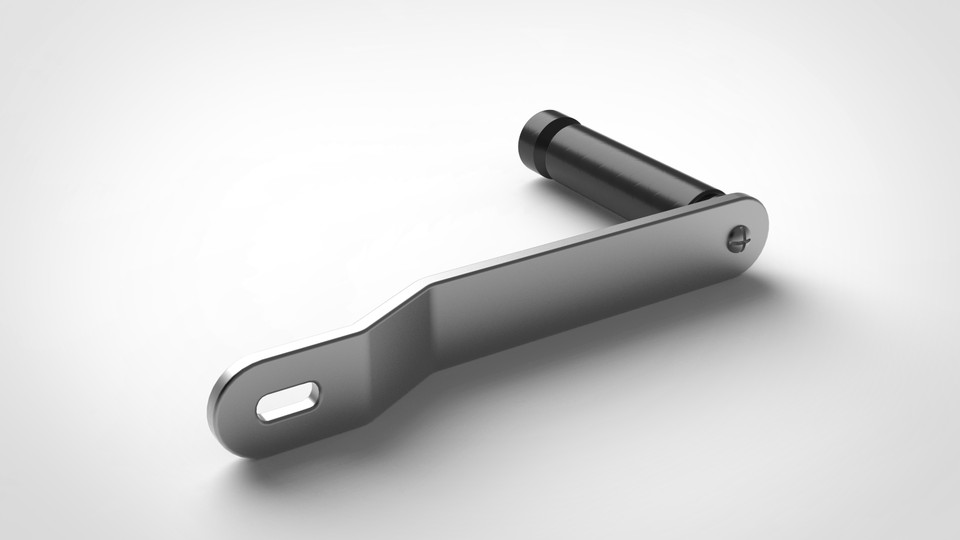
If you have a traditional patio umbrella, chances are it’s equipped with a manual crank handle. While not as convenient as push-button mechanisms, manual handles remain a popular choice due to their simplicity and reliability.
Using a manual crank handle is straightforward – simply turn the handle in one direction to open the umbrella, and in the opposite direction to close it. However, there are a few important tips to keep in mind to ensure your umbrella lasts as long as possible.
First, be sure to avoid applying too much force to the crank handle. If you hear any unusual sounds or feel resistance while turning the handle, stop and inspect the umbrella to ensure there are no obstructions or tangled strings. Applying too much force can cause damage to the winding mechanism or even the umbrella ribs themselves.
It’s also important to store your umbrella properly when not in use, especially during strong winds. If left open during a severe storm, the ribs can bend or even break, rendering the entire umbrella useless. Similarly, leaving your umbrella open on a windy day can cause strain on the crank mechanism and potentially lead to damage.
If you do experience any issues with your manual crank handle, there are a few potential solutions. First, check for any broken pieces or missing components – a simple replacement of the crank bolt or winding mechanism can often fix the issue. Alternatively, you may be able to find helpful resources online with a simple search or by contacting the manufacturer for assistance.
Overall, manual crank handles remain a reliable and popular choice for patio umbrella users who prioritize simplicity and affordability. By following basic maintenance guidelines and avoiding excessive force or stress, your manual crank handle should provide years of dependable use.
Electric Motorized Mechanism
Electric motorized mechanisms have become increasingly popular in recent years, offering a convenient and efficient way to operate a wide range of machines and devices. From garage doors to window shades, these mechanisms provide ease of use and can even add a touch of luxury to everyday items.
One of the key advantages of motorized mechanisms is their speed and reliability. With just the touch of a button, you can open or close your garage door, adjust the tilt of your blinds, or control the temperature in your home. This can save you time and effort, allowing you to focus on other important tasks.
In addition to their ease of use, electric motorized mechanisms are also highly customizable. Many models allow for precise positioning and speed control, giving you greater flexibility and control over your devices. Some even offer advanced features like voice control or smartphone integration, allowing you to operate your devices from anywhere with an internet connection.
Electric motorized mechanisms are also known for their durability and longevity. Unlike manual mechanisms that can wear out over time, electric motors are designed to withstand heavy use and frequent operation. In fact, many models come with warranties of up to 10 years or more, ensuring your investment is well-protected.
When it comes to installation and maintenance, electric motorized mechanisms are generally straightforward and cost-effective. Most models can be installed without professional help, and routine maintenance is often minimal. This makes them a great option for DIY enthusiasts or those looking to save on installation costs.
Overall, electric motorized mechanisms offer a reliable and convenient way to operate a wide range of devices. Whether you’re looking to add a touch of luxury to your home or simply streamline everyday tasks, they’re a smart investment that’s sure to pay dividends in the long run.
Tools You Will Need for Repairs

When it comes to fixing things around your house, having the right tools is essential. Whether it’s a leaky faucet or a damaged piece of furniture, having the proper tools can make the job much easier. Here are some tools you may need for common repairs around your home:
1. Screwdriver set: A set of screwdrivers in different sizes and shapes can come in handy for tasks like tightening loose screws on furniture or appliances.
2. Pliers: Pliers can be used for gripping, cutting, or bending various materials. They are especially useful for tasks like replacing a broken wire or fixing a chain on a bicycle.
3. Hammer: A hammer is a versatile tool that can be used for driving nails, pulling out nails or tacks, or even breaking up concrete.
4. Drill: A cordless drill can be used for drilling holes and inserting screws. It’s a must-have for DIY enthusiasts.
5. Tape measure: For any project that requires precise measurements, a tape measure is essential.
6. Utility knife: A utility knife can be used for a wide range of tasks, including cutting through cardboard, trimming edges, or even opening packages.
7. Wrench set: A set of wrenches in different sizes can be used for tightening bolts or adjusting nuts.
8. Level: A level is a tool used to ensure that surfaces are properly aligned, making it ideal for hanging pictures or installing shelves.
9. Saw: A handsaw is useful for cutting through lumber, while a jigsaw can be used for more delicate cuts.
10. Safety gear: Don’t forget to use protective gear like safety glasses, gloves, and earplugs when working with power tools.
By having these tools at your disposal, you can tackle a variety of repairs around your home with confidence, saving you time and money in the long run.
Screwdriver Set
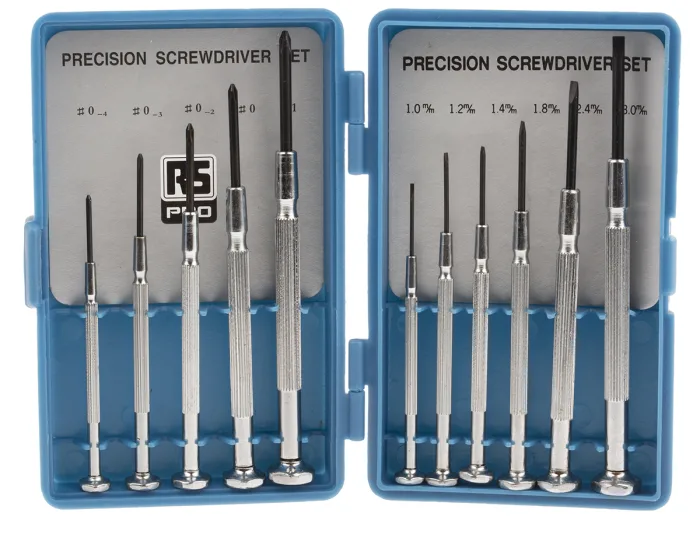
A screwdriver set is a must-have tool for every homeowner or DIY enthusiast. It consists of a variety of screwdrivers with different sizes and shapes that can be used for various tasks. These tasks can range from fixing a loose hinge on a door to assembling furniture.
A screwdriver set can come in handy for tasks like tightening loose screws on furniture or appliances. It’s also useful for computer repairers, as they use it for removing screws to open up computer systems.
There are two main types of screwdriver sets: flathead and Phillips head. Flathead screwdrivers have a flat, straight edge that matches with the slot on a screw, while Phillips head screwdrivers have a cross-shaped point that fits into the corresponding slot on a screw.
Apart from flathead and Phillips head screwdrivers, some sets come with Torx, hex, or star-shaped screwdrivers, which are specially designed to fit specific types of screws.
When picking out a screwdriver set, it’s important to consider the quality of the materials. A set made from durable materials such as high-quality steel will last longer and withstand heavy use compared to cheaper plastic or low-quality metals. The handle grip is also an important consideration as it affects comfort and control while using the screwdriver.
In addition to household tasks, screwdriver sets are also useful for automotive repairs. They can be used to remove and replace screws during car repairs, such as replacing the brake pads or changing the oil filter.
In conclusion, a screwdriver set is an essential tool that every homeowner or DIY enthusiast should have in their toolbox. It’s versatile, durable, and can be used for various tasks around the house and beyond. A good quality screwdriver set is an investment that will last you a long time and make your DIY projects much easier.
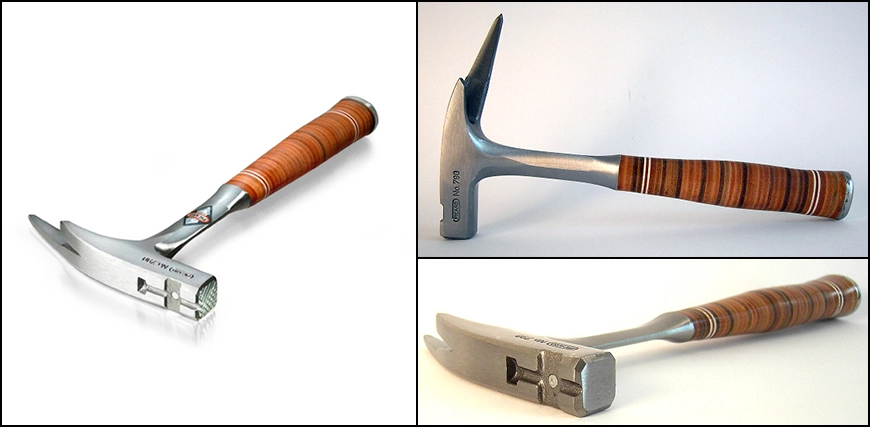
Hammer and Nail Set
When it comes to home improvement or DIY projects, a hammer and nail set are essential tools to have in your toolbox. They’re both versatile tools that can be used for a wide range of tasks, from hanging picture frames to building furniture.
A hammer is a powerful tool that’s used for driving nails into wood, metal, or other surfaces. It’s made of a heavy metal head and a long handle that offers leverage for striking objects with force. There are different types of hammers, including claw hammers and framing hammers, each designed for specific tasks. Claw hammers have a flat head for driving nails and a claw for removing them, while framing hammers have a longer handle and a heavier head for construction projects.
A nail set is a small tool that’s used to drive nails below the surface of a material. This is important for ensuring a smooth, even finish on surfaces like wood. Nail sets come in different sizes and can be adjusted to fit different nail sizes. They’re typically used in conjunction with a hammer to gently tap nails into place and then set them below the surface of a material.
Using a hammer and nail set may seem simple, but there are some tips and tricks to using them properly. First, choose the appropriate hammer for your task – a claw hammer is great for general projects around the house, while framing hammers are best for heavy-duty construction projects. Next, select the right size nail and nail set for your project. Then, position the nail where you want it and tap it lightly into place with the hammer. Finally, use the nail set to drive the nail below the surface of the material.
It’s important to practice proper safety measures when using a hammer and nail set. Wear safety goggles to protect your eyes from debris while hammering and ensure that you’re using the appropriate size nail for your project to prevent bending or breaking. With a bit of practice and a little patience, you’ll soon be hammering and nail setting like a pro!
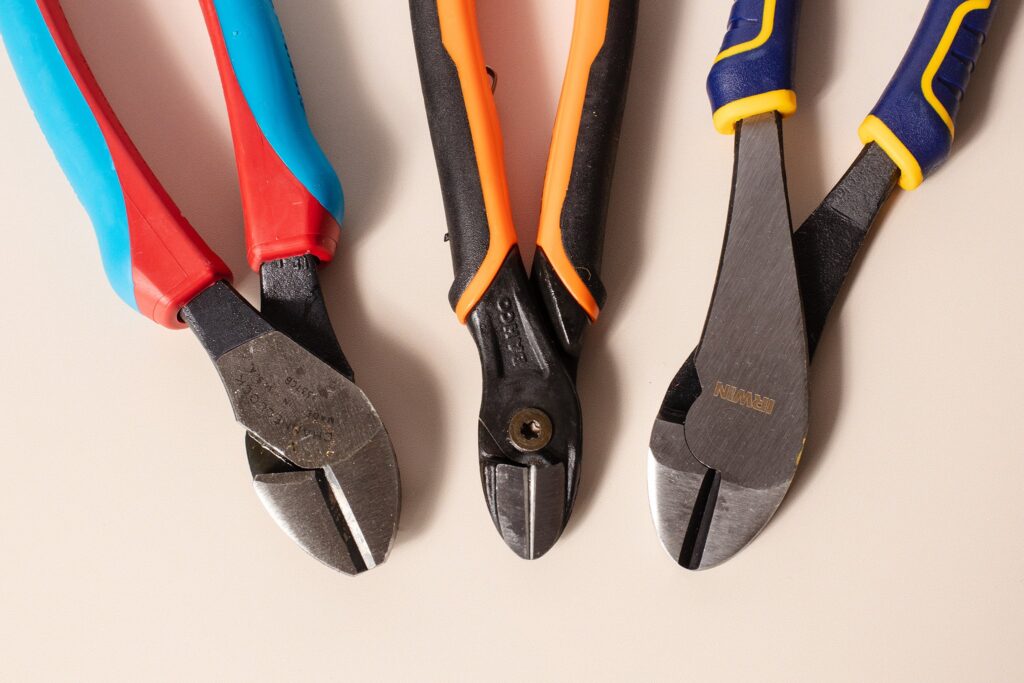
Pliers and Wire Cutters
Pliers and wire cutters are two essential tools that every DIY enthusiast, electrician, or handyman must have in their toolbox. These tools are used for clamping, twisting, and cutting wires, cables, and other materials that are too tough to handle with bare hands.
Pliers are versatile tools that come in different sizes, shapes, and designs. However, they all share the same basic feature – two arms that are hinged together to create a pivot point. At the end of the arms are jaws that are shaped differently depending on the type of pliers. Some pliers come with flat jaws, while others have pointed jaws, curved jaws, or even serrated jaws. Each type of pliers is designed for specific tasks, such as gripping, bending, or twisting wires.
Wire cutters, as the name suggests, are tools used for cutting wires. They come with sharp blades that are designed to cut through tough materials like copper, aluminum, and steel wires. Wire cutters come in different designs, including diagonal cutters, end cutters, and pliers-style cutters. The type of cutter you use will depend on the thickness of the wire and the type of material you are cutting.
When using pliers and wire cutters, it’s important to follow safety measures to avoid any injuries. Always wear protective gloves and goggles when using these tools because the jaws and blades can be sharp and cause injury to your hands or eyes. In addition, always use the right types of pliers or cutters for the job to avoid any damage to the tool or the material you are working with.
In conclusion, pliers and wire cutters are vital tools in any toolbox, and they are essential for DIY projects, electrical work, and other home improvement tasks. Whether you’re cutting wire or just need a good grip, there is a plier or wire cutter that is designed to make your job easier and safer. So, invest in a quality set of pliers and wire cutters and enjoy the benefits of having the right tools for the job.
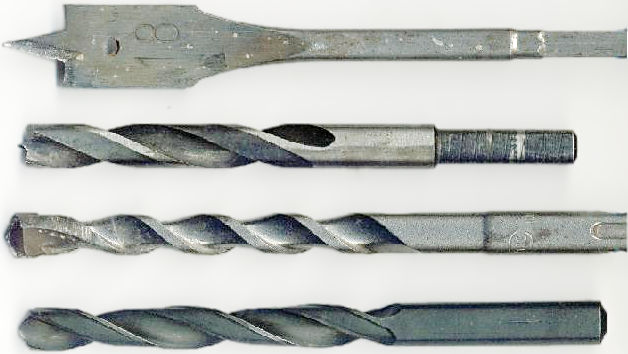
Drill and Bits (optional)
Drills and bits are essential tools for DIY enthusiasts and professionals alike. A drill is a motorized tool that is used to make holes in various materials, including wood, metal, plastics, and concrete. The power of the drill is determined by its voltage, which typically ranges between 12V and 20V.
One of the most important components of a drill is the chuck, which is the mechanism that holds the drill bit in place. Chucks come in different sizes and are designed to accommodate various types of bits. Most modern drills have a keyless chuck, which means you can change the bit by simply turning the chuck by hand.
Drill bits come in various shapes and sizes, and each type is designed for specific tasks. For example, twist bits are used for drilling holes in wood and plastic, while masonry bits are used for drilling into materials like brick and concrete. For metal, cobalt bits are a popular choice as they are specifically designed to handle harsh metals like stainless steel.
When using a drill and bits, safety is paramount. It’s crucial to wear protective gear like safety glasses, a dust mask, and gloves to prevent injuries and minimize dust exposure. It’s also important to use the right kind of bit for the task at hand and to ensure that the bit is securely fastened in the chuck before starting your drill.
In conclusion, drills and bits are versatile tools that can be used for a wide range of tasks. With the right safety precautions and the appropriate bit for the job, you can complete your drilling tasks with ease and precision.
String or Twine (optional)

String or twine is a versatile and ubiquitous material that you’ll find in just about any home. Whether you’re tying up a package or rigging up a trellis for your climbing plants, string or twine is an essential tool that can come in handy in a variety of situations.
One of the most popular uses for string or twine is for gardening. Gardeners use string or twine to create homemade trellises for their plants, hang up bird feeders or wind chimes, or even to mark off rows in their vegetable gardens. The durability and flexibility of string or twine make it a great option for outdoor use, as it can withstand harsh weather conditions and different types of plants.
But string or twine can also be used inside the house. You might use it to hang up picture frames, create a DIY macrame wall hanging, or even to tie together bundles of herbs or flowers. The possibilities are truly endless!
When choosing the right string or twine for your project, there are a few factors to consider. First, you’ll want to think about the material. Cotton, nylon, and jute are all common options, each with their own unique features. Cotton is soft and easy to knot, while nylon is strong and resistant to stretching. Jute, on the other hand, is eco-friendly and has a rustic look.
You’ll also want to consider the thickness of the string or twine, as this can affect its strength and flexibility. A thinner string or twine might be better for delicate projects, while a thicker one might be better for heavier-duty tasks, like tying up a hammock or attaching a swing to a branch.
Overall, string or twine is a simple but essential material that should be in every home. Whether you’re a seasoned DIY enthusiast or a casual novice, you’re sure to find plenty of uses for this versatile tool!
Preparing to Repair the Patio Umbrella’s Crank Mechanism
When it comes to enjoying the outdoors, nothing beats a great patio umbrella. It provides shade and protection from the sun’s rays, making your time outside much more enjoyable. However, just like anything else, patio umbrellas can break down over time. One of the most common problems is a broken crank mechanism. If your patio umbrella’s crank isn’t functioning properly, don’t worry – it’s a problem that can be fixed. Here are some tips for preparing to repair the patio umbrella’s crank mechanism:
First, consult the manufacturer’s manual. This will give you a basic idea of how the crank mechanism works and what parts might be involved. It will also provide any necessary safety precautions, such as recommended tools, protective gear, and proper handling techniques. If you don’t have the manual, you can often find one online by searching the manufacturer’s website or doing a simple online search.
Next, assess the damage. What exactly is wrong with the crank mechanism? Does it just need some lubrication, or are there broken parts that need to be replaced? Is the winding mechanism damaged, or is there a problem with the crank bolt? Take a good look at the mechanism and make a note of what needs to be repaired or replaced.
Once you have a clear idea of what needs to be done, gather the necessary tools and parts. Depending on the extent of the damage, you may need screwdrivers, pliers, a wrench, lubricant, replacement parts, and other items. Make sure you have everything you need before you start the repair process.
Before you begin repairing the crank mechanism, make sure you have a safe and stable work area. This is especially important if you’re using ladders or climbing on chairs to reach the mechanism. Be sure to wear protective gear, such as gloves and eye protection, and take your time to ensure that you’re doing the repair job safely and correctly.
Remember, repairing a patio umbrella’s crank mechanism can be a simple and straightforward process if you’re prepared and take your time. By following these tips, you’ll be well on your way to having a fully functioning patio umbrella once again.
Step-by-Step Guide to Fixing the Crank on Your Patio Umbrella
If you’re an avid patio dweller, you know all too well the frustration of a jammed or broken patio umbrella crank. But before you give up on your trusty outdoor shade provider, know that fixing a crank on a patio umbrella is usually a fairly simple repair. With a little know-how and some basic tools, you can have your umbrella opening and closing smoothly once again.
Step 1: Identify the Problem
The first step in fixing your umbrella crank is figuring out what’s wrong with it. Common issues include stripped or broken gearing, a stuck crank handle, or problems with the winding mechanism. Once you’ve identified the source of the problem, assess whether you have the necessary tools and replacement parts.
Step 2: Disassemble the Crank Mechanism
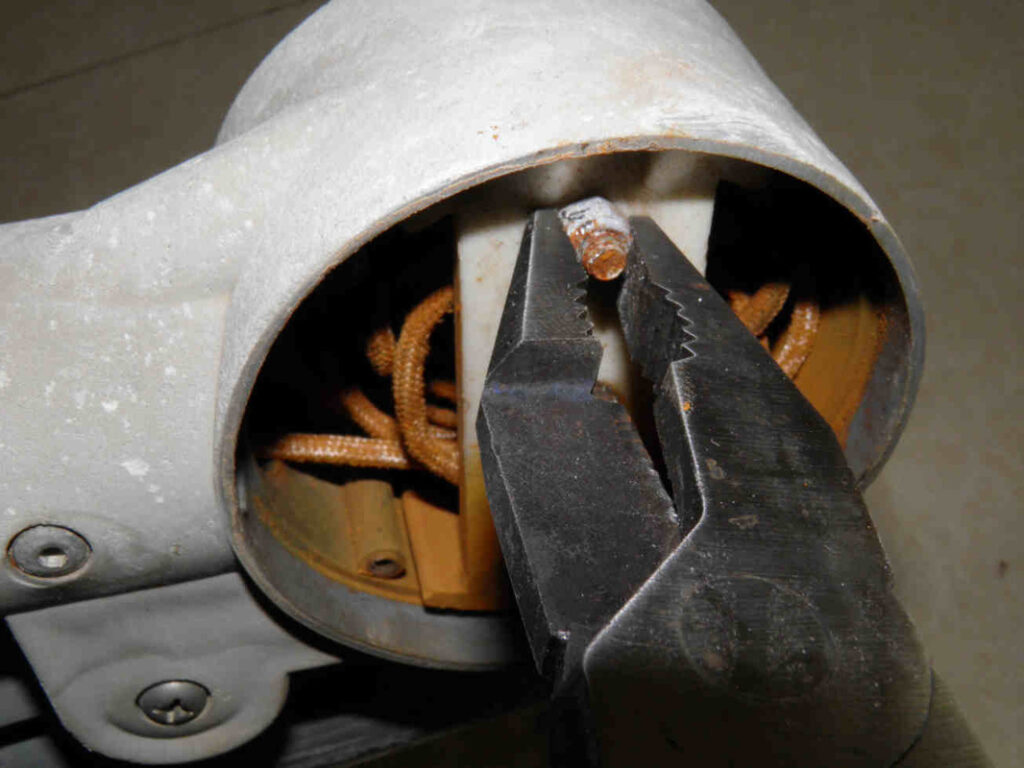
Most umbrellas have a crank mechanism that is housed either inside or on top of the umbrella pole. To access the mechanism, remove any umbrella covers or canopy fabric that might be in the way. Use a wrench or pliers to remove any retaining bolts that secure the crank mechanism in place.
Step 3: Replace Broken or Stripped Parts
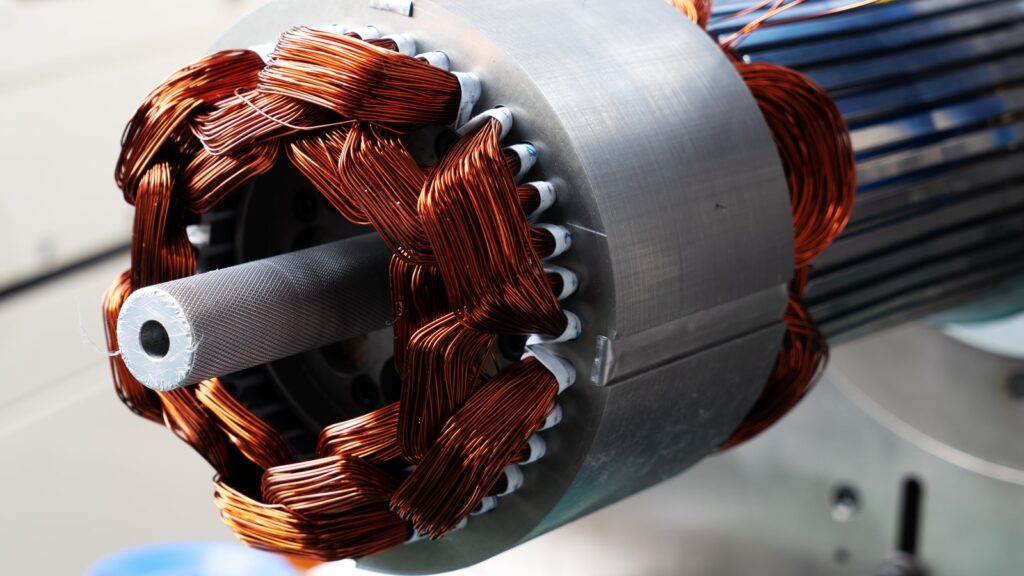
If the problem with your crank is a broken or stripped part, it may need to be replaced. Common parts that might need replacing include the winding bolt, the crank bolt, gear wheels, or the copper piece that connects the handle to the mechanism. Replacement parts can be found online or at your local hardware store.
Step 4: Lubricate the Mechanism
If the issue is with a stuck handle or a mechanism that’s difficult to turn, you may just need some lubrication. Apply an all-purpose lubricant to the winding mechanism and any gears or wheels. Be sure to wipe away any excess lubricant once you’ve applied it.
Step 5: Reassemble the Mechanism
Once you’ve replaced any broken parts and lubricated the mechanism, it’s time to reassemble everything. Insert the winding bolt and the crank bolt, and then replace any retaining screws or bolts. Give the crank handle a few turns to make sure everything is moving smoothly.
Step 6: Test the Umbrella
The moment of truth has arrived. Open and close your umbrella a few times to ensure that the crank is working properly. If the umbrella still isn’t working right, you may need to consult an expert or the manufacturer for further assistance.
In conclusion, fixing a broken or stuck patio umbrella crank can be done by almost anyone with a few basic tools and some patience. By following these steps, you can have your favorite patio accessory working like new in no time and be ready to enjoy your relaxing outdoor space once again.
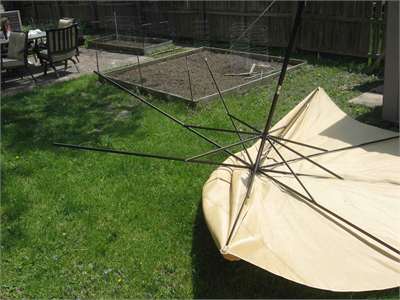
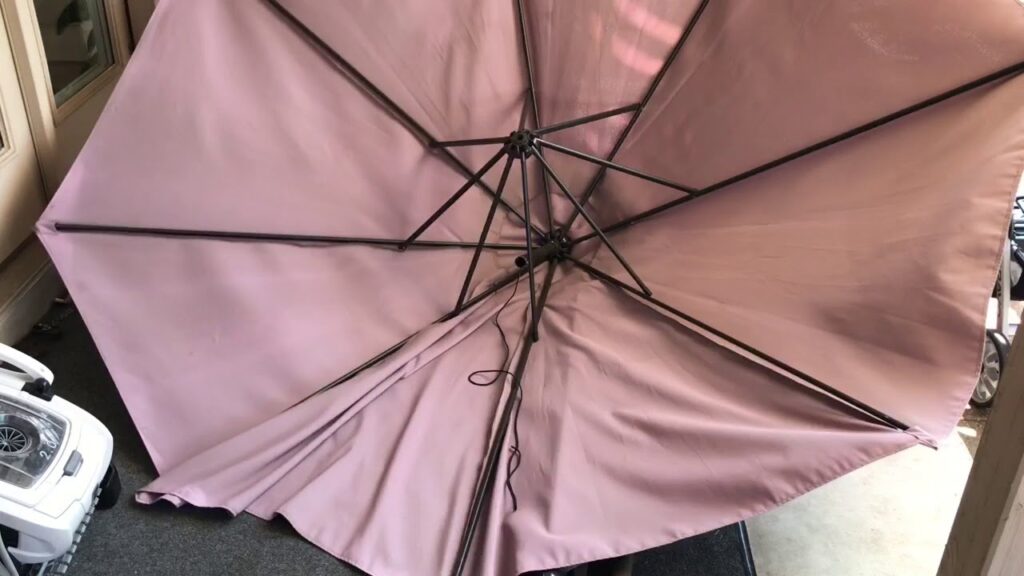
Check for Broken Parts: Ribs, Strings, Pins, Bolts, etc.
When it comes to patio umbrellas, it’s important to keep them in good working order. After all, they provide valuable shade and protection from the sun’s harmful UV rays. One of the most common issues with patio umbrellas is broken parts, which can occur due to normal wear and tear or even strong winds. In this article, we’ll focus on how to check for broken parts, including ribs, strings, pins, bolts, and more.
First, let’s talk about the umbrella ribs. These are the thin metal or plastic pieces that run from the umbrella pole to the edge of the umbrella canopy. Over time, ribs can become bent or even snap, leaving the umbrella canopy sagging or misshapen. To check for broken ribs, simply open your umbrella and inspect each rib for damage. If you notice any bent or broken ribs, it’s best to replace them as soon as possible.
Next up is the umbrella string. The string, usually made of nylon or another durable material, is used to hold the ribs in place and allow the umbrella to open and close smoothly. If the string breaks, the entire umbrella may become difficult or impossible to use. To check for broken strings, open your umbrella and gently tug on each rib to see if it moves freely. If a string is broken, you may need to replace it or even the entire umbrella.
Another key component of your umbrella is the pins and bolts. These are used to secure the umbrella ribs to the pole and allow for easy opening and closing. If a pin or bolt becomes bent or broken, your umbrella may not work properly. To check for broken pins and bolts, visually inspect each part and make sure they’re all securely fastened.
Finally, consider checking the crank mechanism. This is the handle used to open and close the umbrella, and it’s often one of the first parts to wear out over time. Check for any signs of wear or damage on the winding mechanism, winding bolt, and crank hole. If you notice any issues, it may be time to replace the crank mechanism or even the entire umbrella if the damage is severe.
By regularly checking for broken parts on your patio umbrella, you can help ensure that it lasts for years to come. If you do notice any damage or wear and tear, don’t hesitate to take action and get it fixed as soon as possible. With a little bit of maintenance, you can enjoy the shade and comfort of your patio umbrella for many seasons to come.