What is a Toy Hauler?
Toy haulers have become increasingly popular among camping enthusiasts in recent years. These versatile trailers are designed to haul not just your camping gear, but also any outdoor toys such as ATVs, motorcycles, or kayaks, that you may want to bring along on your trips.
A toy hauler is essentially a combination of a travel trailer and a cargo trailer. It offers the living space and amenities typically found in a travel trailer but also has a large ramp door at the back that doubles as an entryway to a garage area for hauling and storing your outdoor equipment. The garage area can also be converted into a living space or a patio area, providing additional conveniences and outdoor living space.
Toy haulers come in a variety of sizes and configurations, from small compact trailers that can be towed by a midsize SUV to larger rigs that require a heavy-duty pickup truck for towing. They also come with a host of features such as built-in generators, awnings, and ramps, to name a few. These features can add to the convenience and comfort of camping, making them a favorite among camping enthusiasts who want to bring the comforts of home along with them on their outdoor adventures.
If you’re in the market for a toy hauler, it’s important to consider your towing capacity, the size of your family or group, the features you require, and the type of outdoor activities you plan to engage in. With so many options available, you are sure to find a toy hauler that fits your unique needs and preferences.
What is a Ramp Door Patio Kit?
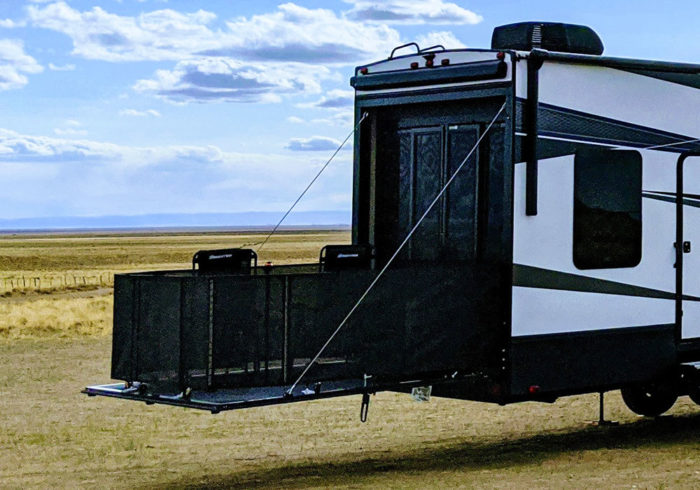
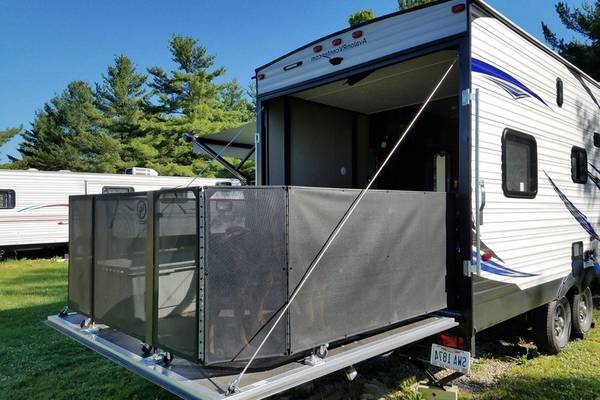
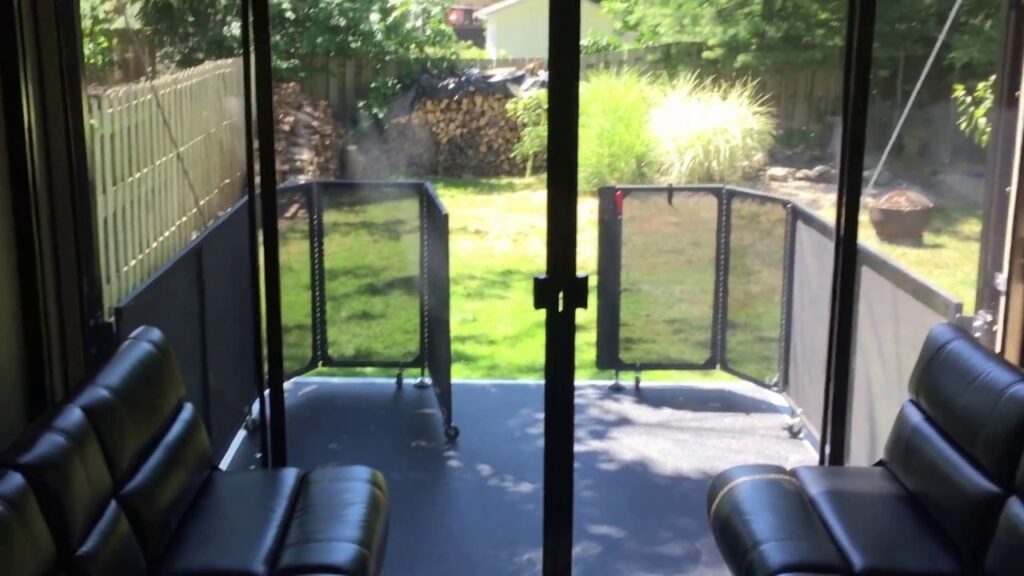
A ramp door patio kit is a feature that can be added to a toy hauler to create additional outdoor living space. It essentially turns the ramp door into a patio area that can be used for lounging, dining, or simply enjoying the beautiful surroundings on your camping trip.
To create a ramp door patio, you will need a kit that typically includes a set of steel cables, brackets, and a set of patio rails. The cables are attached to the underside of the ramp door and extended outwards to support the patio rails, creating a sturdy and stable platform for your outdoor activities.
One of the key benefits of a ramp door patio is its convenience. With this feature, you can easily and quickly set up a comfortable outdoor space without the need for additional equipment or accessories. Plus, when you’re ready to hit the road again, the patio can easily be retracted, and the ramp door can be closed up, leaving your toy hauler ready to hit the road.
Another benefit of a ramp door patio is its versatility. With the addition of some outdoor patio furniture and a few personal touches, you can create a lovely outdoor retreat that is perfect for relaxation or entertaining guests. Adding some patio accessories such as an outdoor rug or some outdoor lighting can also help to create a cozy and inviting atmosphere.
Overall, a ramp door patio kit is an excellent addition to any toy hauler, as it offers convenience, versatility, and an enhanced camping experience. Whether you’re looking to add some extra space to your outdoor living area or simply want to enjoy the outdoors more comfortably, a ramp door patio is an excellent solution.
Preparing the Space
Creating a patio space from your toy hauler ramp can completely transform your camping experience, and it doesn’t have to be a difficult process. By following a few simple steps, you can turn your ramp into a functional and stylish outdoor space that you’ll love spending time in.
The first step in preparing the space is to lay down a base. Depending on your preferences and budget, this can be as simple as a piece of outdoor carpet or as elaborate as acacia hardwood flooring. This will provide a stable and comfortable surface for your best patio furniture and prevent any dirt or debris from getting tracked into your toy hauler.
Once you have your base laid out, it’s time to start thinking about storage. The limited storage space inside a toy hauler can make camping gear organization challenging, but by using the space under your ramp, you can create a lightweight storage area that is both accessible and convenient. This can be accomplished by installing metal brackets or clamped-on jacks to hold additional storage containers or even camping chairs.
Next, consider adding some steps to make getting in and out of your new patio space even easier. Quad step configurations or a base step with handrail are popular options that can be easily installed underneath the ramp, allowing for safe and easy access to your patio area.
Once you have the basic setup in place, it’s time to start customizing your space to your personal taste and style. This can be achieved by adding outdoor patio furniture such as tables, chairs, and lounges, as well as outdoor lighting and décor. Don’t be afraid to get creative and think outside the box – with a little imagination, the possibilities are endless.
In conclusion, preparing the space to turn your toy hauler ramp into a stylish patio is a simple and rewarding process. By laying down a comfortable base, creating additional storage space, and adding functional steps, you can transform your ramp into an attractive and functional outdoor living area that will enhance your camping experience. Just remember to have fun with it, and create a space that reflects your personal style and taste.
Location of the Patio
The location of your patio can greatly affect your overall outdoor experience. When choosing where to place your patio, there are several important factors you should consider.
Firstly, you want to choose a spot that is easily accessible from your home or living space. If your patio is too far away or requires navigating through difficult terrain, you may be less likely to use it regularly. Consider the layout of your yard and how you can create a natural flow between your indoor and outdoor spaces.
Secondly, you want to consider the amount of privacy and shade that your patio location will provide. If you have nearby neighbors or a busy street, you may want to choose a location that is more secluded or protected by trees and landscaping. Similarly, if you live in a hot and sunny climate, you may want to choose a location that provides ample shade or consider adding a patio awning or umbrella.
Thirdly, it’s important to think about the surrounding environment and how it will affect your patio experience. For example, if your patio faces a beautiful view or a nearby body of water, you may want to position it in a way that maximizes these scenic elements. Alternatively, if your patio is located near a high-traffic area or noisy machinery, you may want to consider adding sound-blocking measures or choose a location that is further away.
Finally, the orientation of your patio can greatly affect the amount of natural light and warmth it receives. Consider whether you want a patio that gets a lot of morning or afternoon sun, or if you prefer a more shaded and cooler space. With careful placement, you can create a patio that is perfect for your individual preferences and needs.
Overall, the location of your patio plays a crucial role in the overall enjoyment and comfort of your outdoor space. By taking into account accessibility, privacy, shade, environment, and orientation, you can create a patio that is both functional and beautiful.
Checking for Any Hazards
If you are planning on doing a project around your home or workplace, it is crucial that you take the time to check for any possible hazards that could cause injury or accidents. Hazardous materials, sharp objects, slippery surfaces, and tripping hazards are just some of the common safety concerns you should look out for.
Before starting any work, it is important to carefully review the area where you will be working. This will allow you to determine any potential issues and take the necessary steps to ensure that you and others are safe while carrying out the project.
If you are working on a construction or renovation project, it is essential that you identify and address potential electrical hazards, such as exposed wires or overloaded circuits. Additionally, you should always pay close attention to any materials that you plan to use, including chemicals, paints, and adhesives, and follow all proper handling and disposal procedures.
Sharp objects, such as scissors, knives, and power tools, can also pose a significant risk if not handled properly. Make sure that all tools are sharp, clean, and in good working condition to help prevent accidents or injury.
In addition to these types of hazards, you should also be aware of slip and fall hazards, which can often go unnoticed but can have serious consequences. Keep a close eye out for wet surfaces, loose flooring, and uneven ground, and take the necessary steps to prevent any potential falls.
Overall, it is important to take the time to assess the work area and identify any potential hazards that could cause injury or accidents. By doing so, you can ensure that you, your team, and anyone else who may be present are safe while carrying out the project. Remember, safety is always the top priority!
Measuring and Marking the Space
Whether you’re installing new shelves, putting up curtains or building a deck, measuring and marking the space is an important step to ensure your project runs smoothly and accurately. Here are some tips to help you get it right:
1. Use the right tools: Measuring accurately requires the right tools. A tape measure, square and level are essential for most projects. For more complex jobs, you may need a laser level, plumb bob or string line. Make sure your tools are in good condition and calibrated before you start.
2. Measure twice, cut once: This old adage still rings true. If your measurements are off, your project won’t fit together properly. Measure the same distance at least twice to ensure accuracy and avoid costly mistakes.
3. Account for irregularities: Most spaces aren’t perfectly square or level. Take into account any uneven walls, floors, or ceilings, and adjust your measurements accordingly. You may need to cut angles or use shims to make everything fit properly.
4. Mark your measurements: Once you have your measurements, mark the space. Use a pencil to mark your measurements on the wall, floor or ceiling. If you’re working with wood or other materials, use a square to mark your lines.
5. Use reference points: Reference points, like the edge of a door or window, can help ensure your measurements are accurate and that your project is square. Use them as a guide to check your measurements and avoid mistakes.
6. Double-check before cutting: Before you make any cuts, double-check your measurements and marks. Make sure everything lines up and is square. This will save you time and money in the long run.
Taking the time to measure and mark your space before you start your project will ensure that everything fits properly and looks great. By following these tips, you can avoid costly mistakes and make your project a success.
Removing Debris from the Area
When undertaking any type of construction project, debris can quickly pile up and become hazardous if not removed properly. It’s important to keep the work area clean and clear of debris for safety reasons, as well as to maintain a professional appearance.
The first step in removing debris is to identify where it’s coming from. This can include excess materials, broken equipment, or even natural debris like leaves or dirt. Once you have identified the sources of debris, create a plan for removal.
Start by designating a specific area for waste and debris. This can be a dumpster or waste collection area that’s large enough to hold all of the debris. It’s important to keep this area well-lit and clearly marked so that everyone on the job site knows where to put the debris.
Next, remove debris from the work area on a regular basis. This can be daily or several times a week, depending on the size and scope of the project. If you’re working on a large construction project, it may be necessary to hire a waste removal company to handle the volume of debris.
When removing debris, make sure to wear the appropriate protective clothing and equipment, such as gloves, hard hats, and sturdy shoes. Use proper lifting techniques to avoid injury, and do not overload your waste containers or dumpsters.
In addition to keeping the work site clean and safe, removing debris can also prevent damage to the environment. Natural debris like leaves and branches can present a fire hazard, while construction materials like concrete and metal can be harmful to wildlife.
In conclusion, removing debris from a work site is an essential part of any construction project. It’s important to identify the sources of debris, create a designated collection area, and remove debris on a regular basis. By keeping the work area clear of debris, you’ll ensure a safer and more professional environment for everyone involved.
Installing the Ramp Door Patio Kit
If you’re an avid traveler with a toy hauler, you know that outdoor space is at a premium. However, with the installation of a ramp door patio kit, you can easily transform your toy hauler ramp into a functional outdoor patio.
The first step in installing a ramp door patio kit is to find a kit that’s compatible with your particular toy hauler. Most manufacturers offer specific kits for their models, so be sure to do your research before making a purchase.
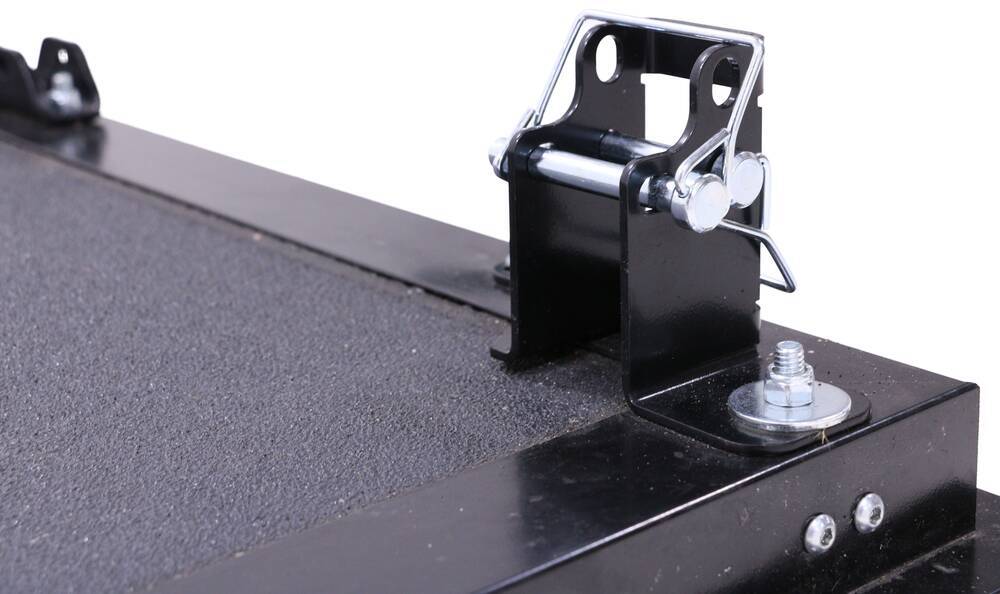
Once you have the kit in hand, start by removing any existing ramp door cables or hardware. Next, install the conversion cable kit for the patio doors and attach the steel cables to the designated brackets on the ramp door.
Next, install the patio door kit using the included hardware. Make sure to follow the manufacturer’s instructions carefully, as the specifics may vary depending on your model.
Once the patio door kit is in place, it’s time to set up your patio space. This can include outdoor patio furniture, patio railing kits, or even outdoor flooring for patio areas. Consider adding storage options, such as additional storage compartments or lightweight storage options, to keep your camping gear neat and organized.
To fully enjoy your new patio space, consider investing in patio accessories such as a party canopy or outdoor lighting. This will provide not only functional benefits but will also enhance the aesthetic of your camper’s exterior.
Lastly, remember safety when using your new ramp door patio kit. The ramp door must be in a locked position while in patio mode, and it is recommended to use clamped-on jacks or common jacks to keep it stable. Additionally, be mindful of weight limits for the ramp door and patio area, as loading it beyond capacity can pose a potential hazard.
In conclusion, adding a ramp door patio kit to your toy hauler is a convenient and effective way to create additional functional outdoor space. By following this guide, you can have your patio mode installed in no time and enjoy the benefits of convenient patio space during your camping experience.